Configuring a new MVC 5 website to authenticate against an Azure Active Directory is really simple – all you need to do is configure using the ASP.Net 4.5 Web Application creation wizard when you create a new project as described here.
If you complete that successfully and add an Authorize attribute to one of your controllers or actions then you’ll find everything works as you’d expect.
However if you try and use roles with AD groups (obvious thing to try right – particularly now groups are exposed in the management portal) you’ll find you get UnauthorizedException’s being thrown. This is because, out of the box, the current implementation doesn’t translate group memberships into role claims.
Fortunately this is fairly straightforward to resolve by supplying a specialization of the System.Security.Claims.ClaimsAuthenticationManager class to ASP.Net and using the Azure AD Graph API to retrieve the memberships of the authenticated user.
The good news is I’ve done the grunt work for you and extended the NuGet package I blogged about recently to include an implementation of a claims authentication manager that does just this. You can take a look at the code involved here. It makes use of the Windows AD Graph API Helper Library posted on MSDN which takes care of some of the required service wrapping.
As before the source for the whole library is in GitHub and covered by the MIT license and a NuGet package is available.
In order for you to use AD groups as roles then your application is going to need to be able to read data from your Azure AD and to allow that you’ll need to do some additional configuration of your application inside the Azure Management Portal. The New Project wizard will have added your website to your Active Directory which you can see in the Management Portal on the Applications page. You can see mine listed below:

Select your application and you’ll be taken to the application configuration page which should look something like the below:
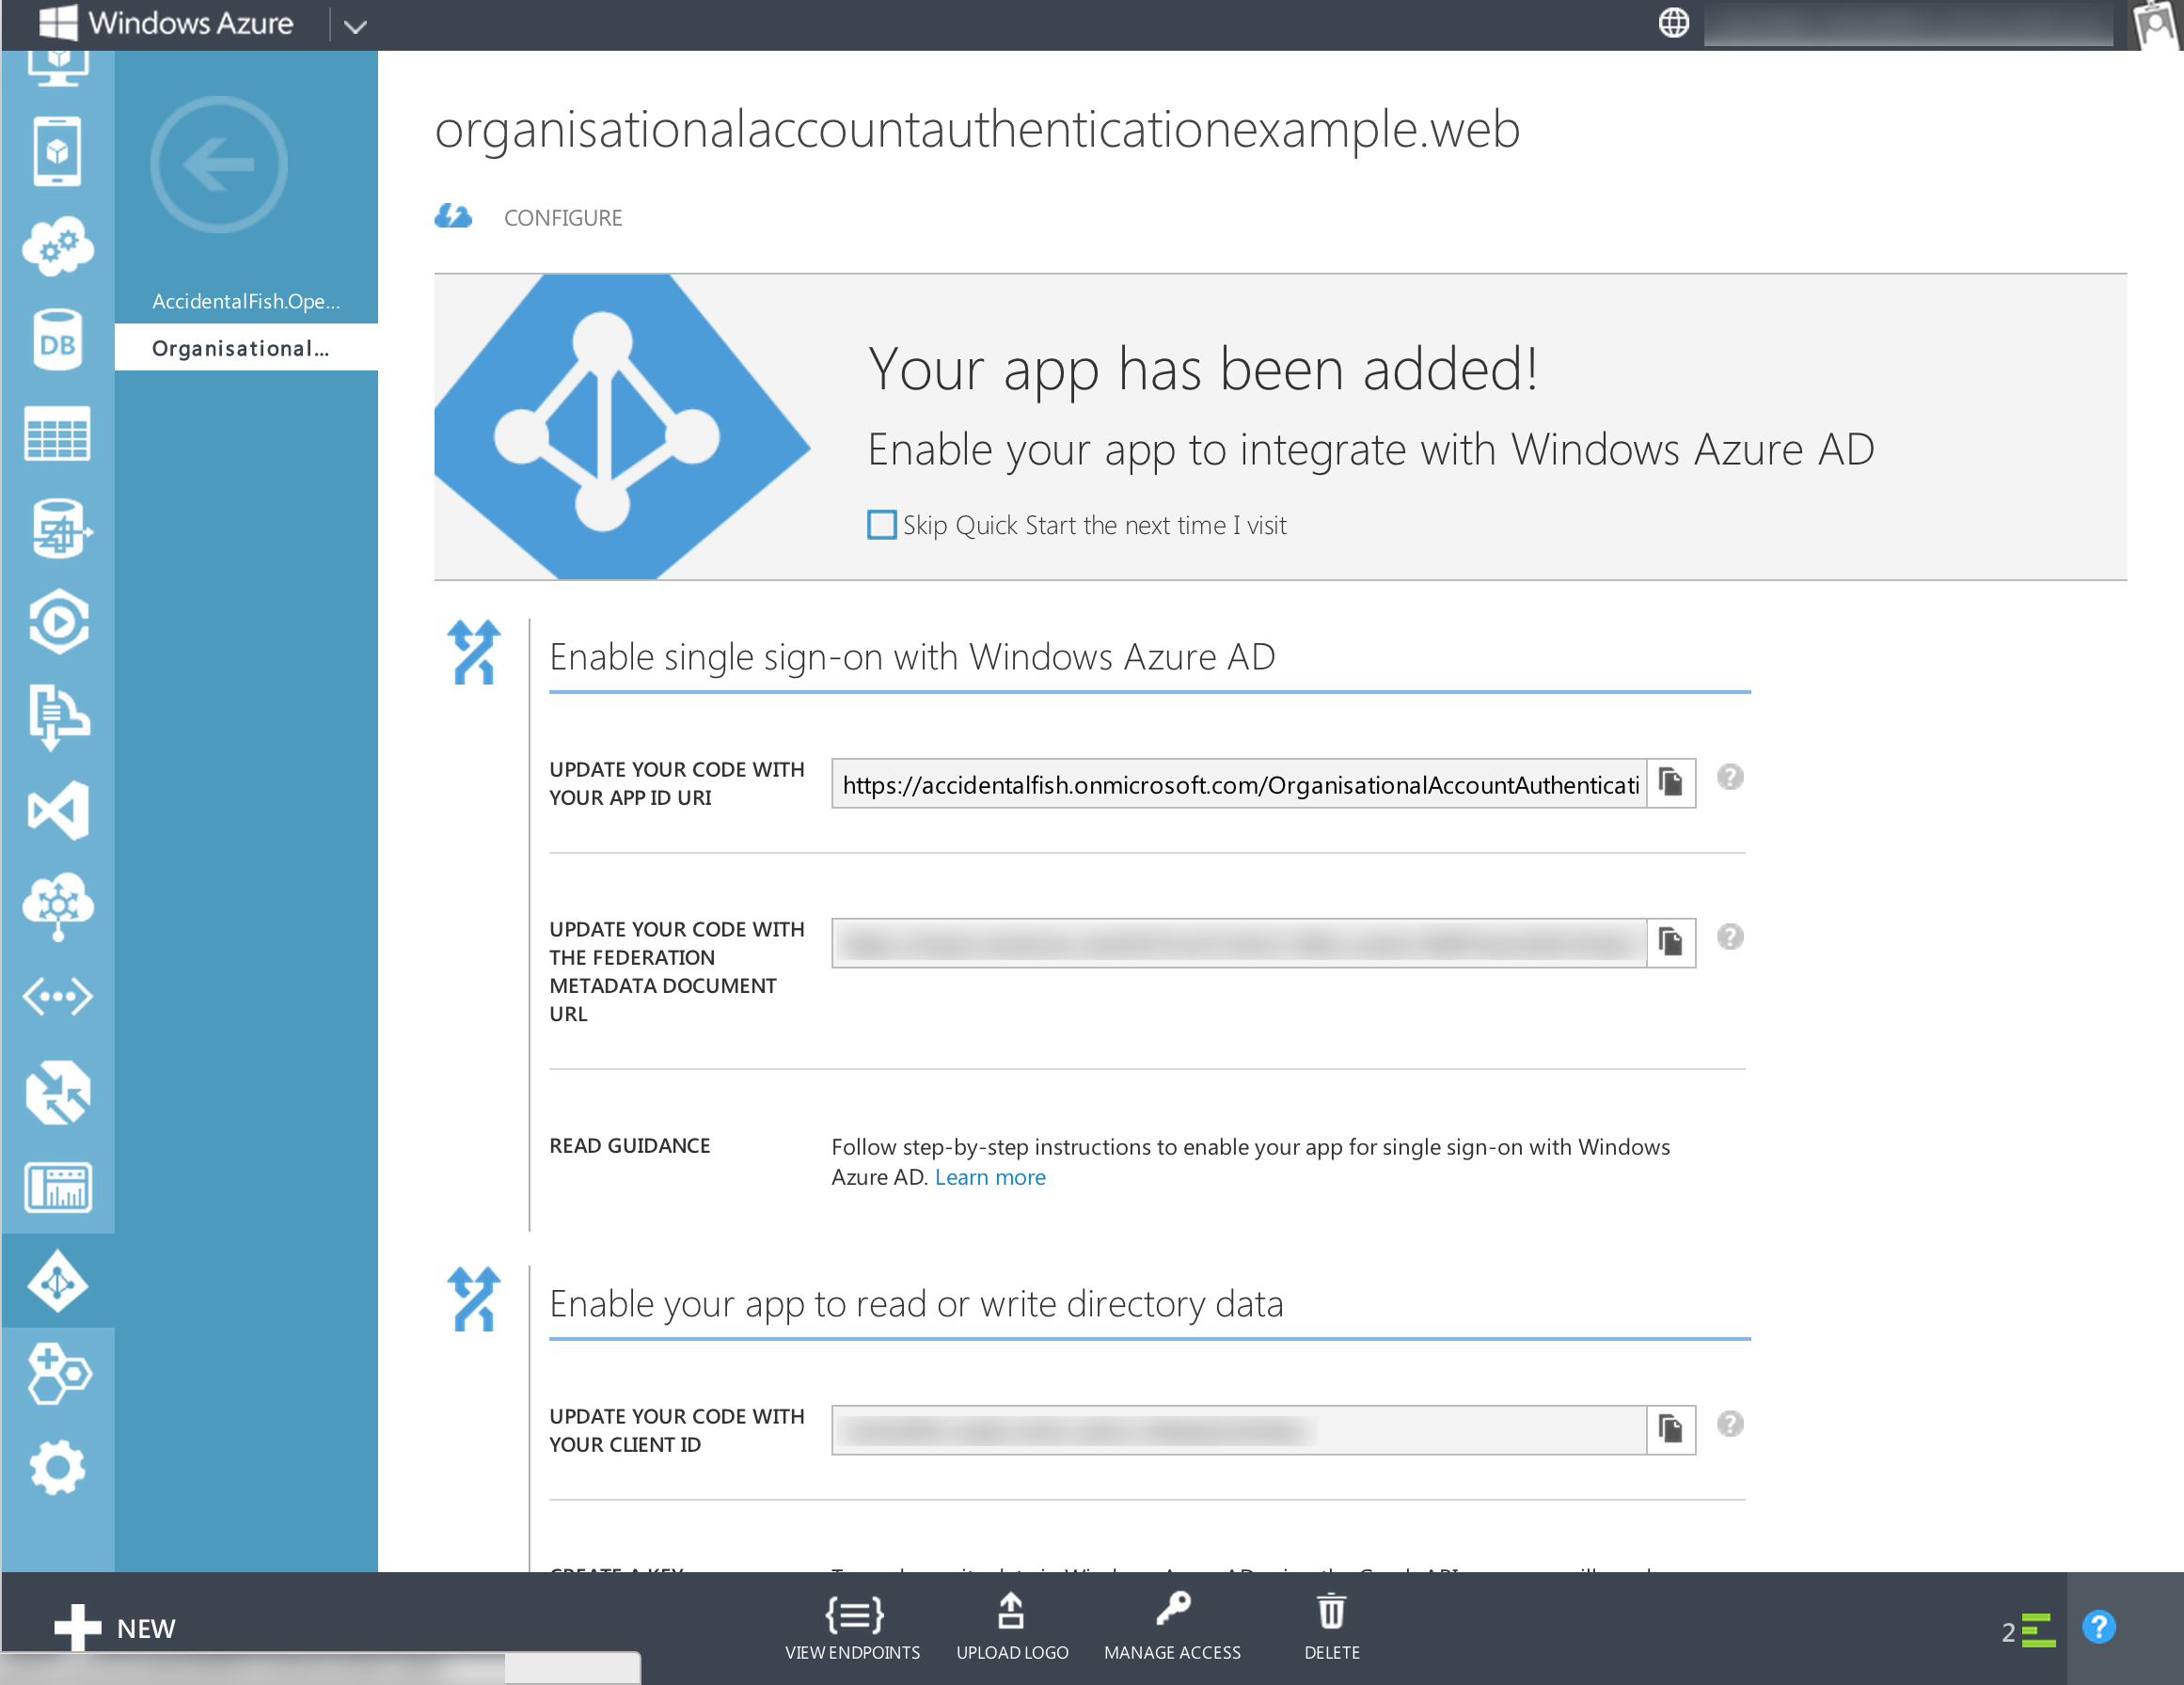
To configure your app you need to tap the Manage Access button down the bottom. Do that and then select Change the directory access for this app. Then on the next page select Single sign on, read directory data.
Azure will whirr away for a short while changing settings on your AD and when it’s done you need to go to the Configure tab (click configure at the top of the page as shown in the image above). In here you need to create a key that your application can use to authenticate with the Graph API and read AD data.
To do this scroll down to the Keys section and click the drop down and choose whether you want a 1 year or 2 year key. In the screenshot below I’ve picked 1 year.

After you’ve done this click save in the toolbar at the bottom and you’ll see your key.
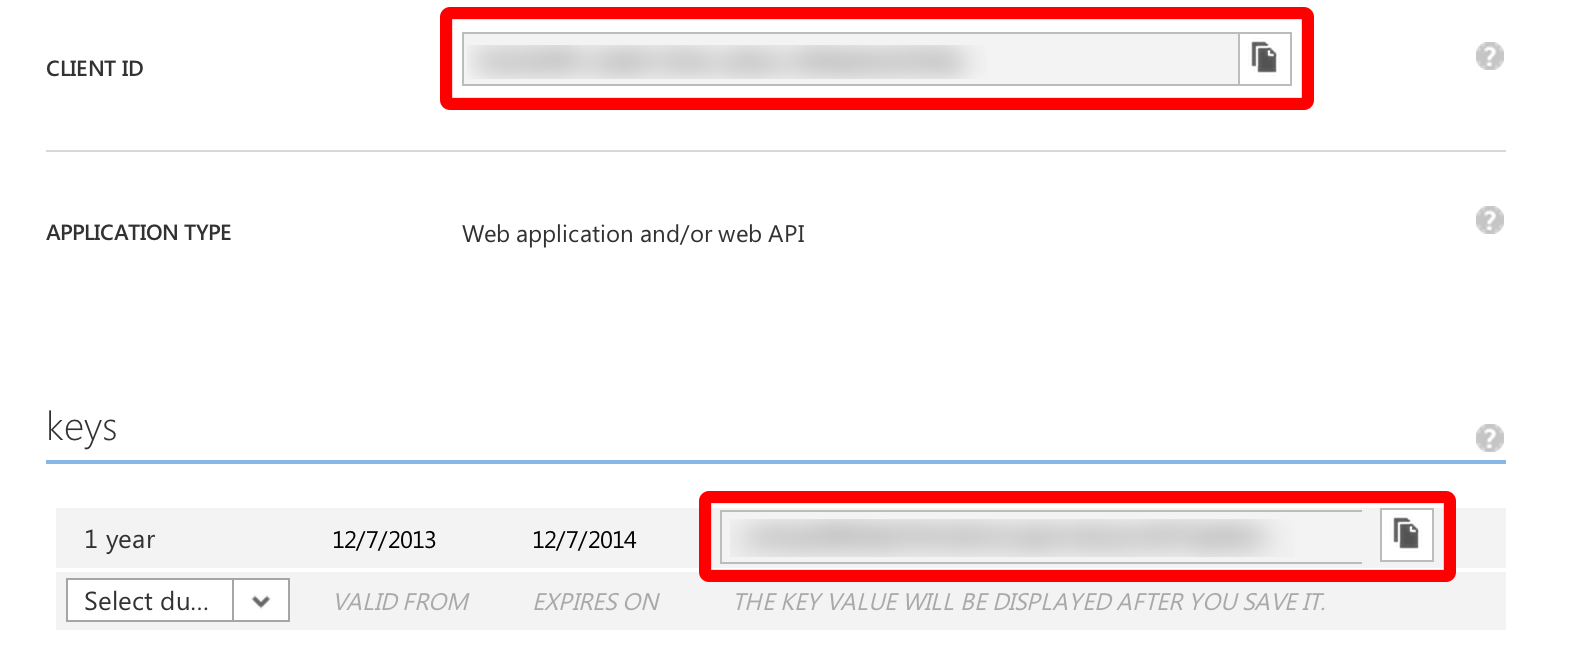
We’ve just about done in the Azure Management Portal all you need to do before you leave is take note of the Client ID and the Key as shown in the image below (mine are blurred out!).
For the rest of this walkthrough I’m assuming you’re configuring a web site rather than an Azure Web Role but the claims manager we are using uses the Azure Configuration Manager for both so if you are using a Web Role you can simply put the settings in your .cscfg and .csdef files.
Firstly add the NuGet package to your project which you can do in the Package Manager GUI or in the console:
Install-Package accidentalfish.aspnet.identity.azure
Then you need to edit your web.config file with a couple of app settings. For this you need your Client ID and Key that you noted down earlier.

The RoleClaimIssuer is optional but is the claim issuer you want inserted into the claim, if you leave this out the issuer will be set as DefaultRoleIssuer.
The final step you need to take is to tell the ASP.Net identity model about the claims manager. To do this locate the <system.identitymodel> section of the web.config file and insert the line highlighted below at the bottom:
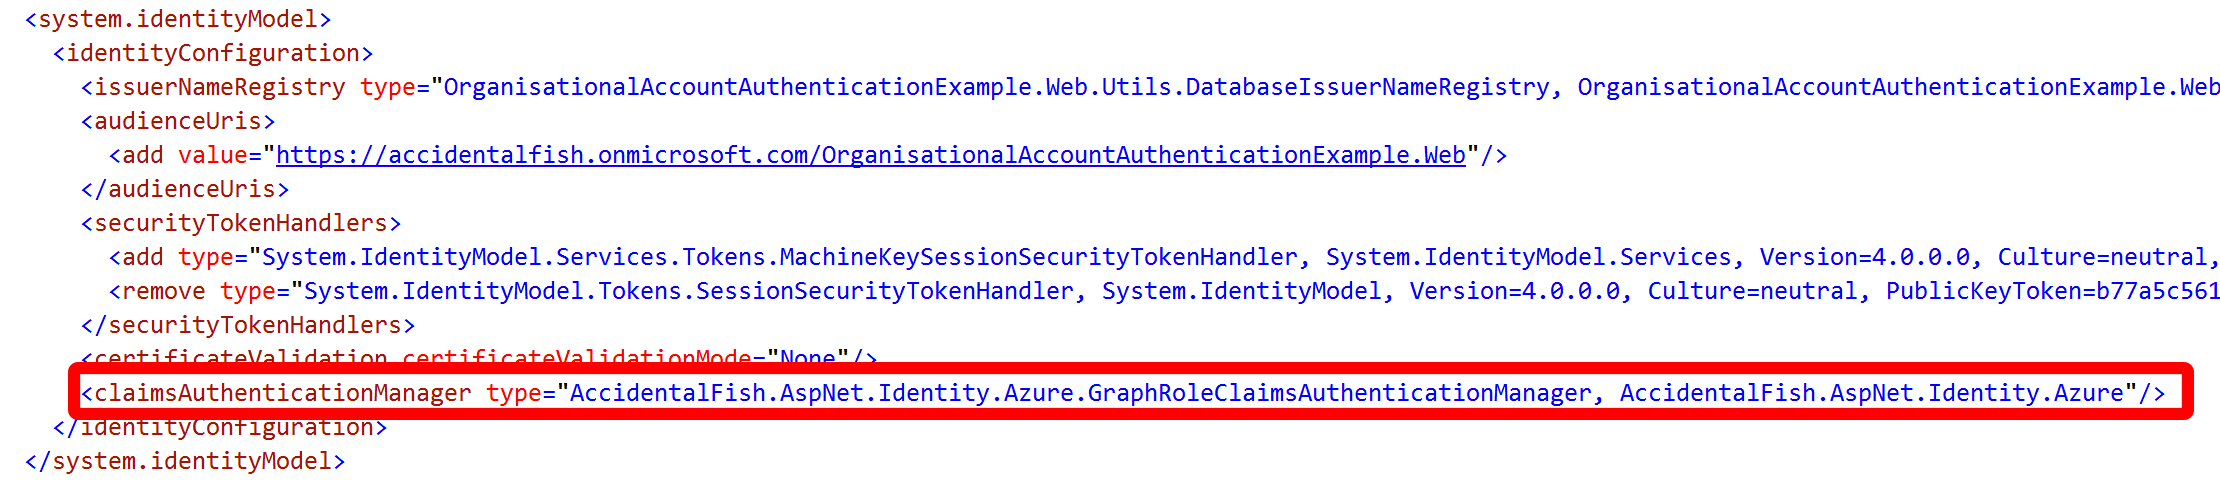
To save you some typing the line to paste is:
<claimsAuthenticationManager type="AccidentalFish.AspNet.Identity.Azure.GraphRoleClaimsAuthenticationManager, AccidentalFish.AspNet.Identity.Azure"/>
With that you’re done. You can use the groups you’ve configured in the Azure AD as roles with the [Authorize(Roles=”…”)] attribute.
I hope all this is useful, if you have any feedback then please do get in touch.

Recent Comments