Category: SAFE

Creating FableTrek – Part 1

If you want to follow along with this series of posts the source code and be found here, the published game here and the source for this specific post here.

If you read my blog or follow me on Twitter you’ll know I’ve really fallen in love with F# this last year and am using the SAFE stack to build out my cycling performance application. A big part of that toolkit is Fable – the F# to JavaScript transpiler that also comes with some great bindings and tools for building single page applications.

A few people have asked me how to get started with Fable, why I think F# is so well suited for this kind of work, and how to make the transition from C# and so I thought I’d build out a simple game using Fable and talk about it in a series of posts / videos.

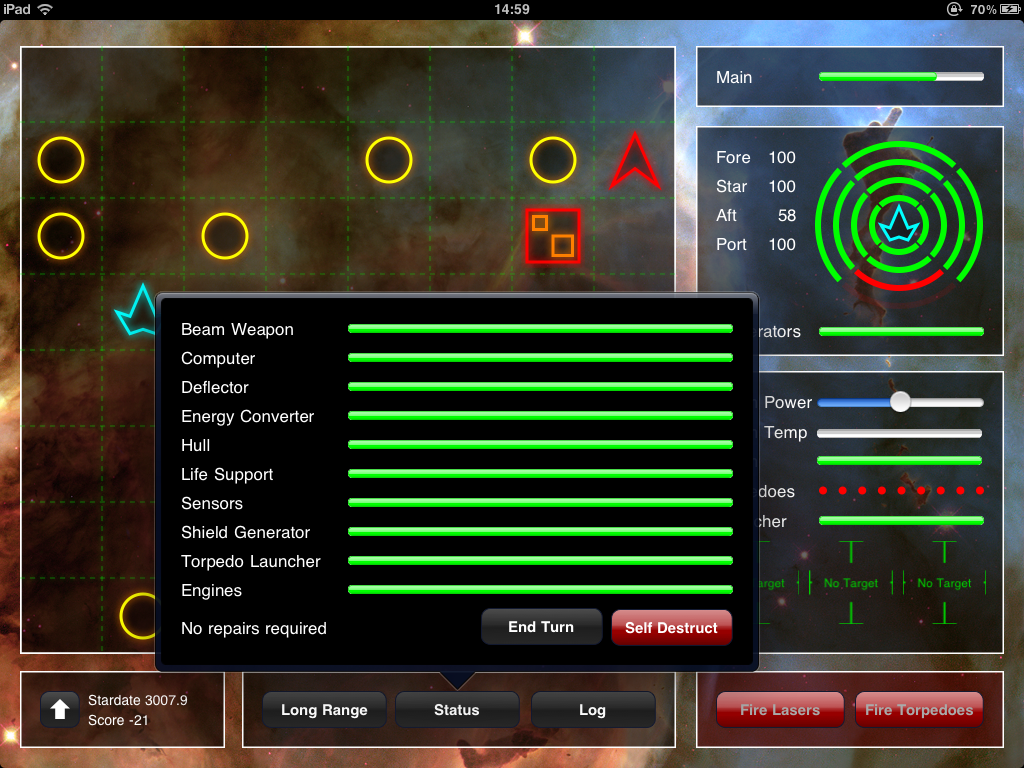
Now before anyone gets too excited this isn’t going to be the next Halo! Instead I’m going to rework my iOS version of the classic Star Trek game (PaddTrek) into Fable – now called FableTrek!

PaddTrek – an early iPad game

Its not going to be flashy but hopefully strikes the right balance between complex enough to show real problems and solutions and simple enough to understand. I don’t have a grand up-front plan for building out this game and I’m creating each part as I go – lets just hope it doesn’t turn out like the new Star Wars trilogy!

I’ll also add that I still class myself as a relative beginner with F# but I do manage to get stuff done.

With all that out of the way – lets take a look at the first code drop.

Exploring the code

To get started I used this bare bones starting point for a simple Fable app with webpack and debug support for Visual Studio Code (hat tip to Isaac Abraham who created this for me to help me out a little while back).

I’ve then added a few things to it:

One of the first things to wrap your head round with Fable is that it lives in both .NET and JavaScript worlds. And so in the root folder you’ll find a package.json and a webpack.config.js and in the src folder a F# project file – App.fsproj.

When adding dependencies you’ll often find yourself adding both a NuGet package and an npm package. I’m using the dotnet command line tools to manage the former and yarn for the latter.

The Fable compiler itself is generally invoked through webpack using the fable-loader plugin. I’ve got a fairly simple webpack file – I’ve added support for Stylus and a little work to output a production build to a deploy folder.

App.fs and Index.html – entry point

Starting up a React app in F# is not much different to doing the same with JavaScript or TypeScript. First you need a HTML file:

<!doctype html>
<html>
<head>
  <title>Fable</title>
  <meta http-equiv='Content-Type' content='text/html; charset=utf-8'>
  <meta name="viewport" content="width=device-width, initial-scale=1">
  <link rel="shortcut icon" href="fable.ico" />
</head>
<body>
    <div id="trek-app"></div>
</body>
</html>

We’re going to create the React app inside the trek-app div block. You might notice their is no <script> tag – so how does any code get invoked? I’ve set up webpack to inject the <script> tag during the build process using the HtmlWebpackPlugin plugin – this way we can handle unique script filenames that include a hash component.

The code entry point for our app is App.fs in the source folder. At the top of the file first we import some dependencies:

open Elmish
open Fable.React
open App.Types
open App.State
open Fable.Core.JsInterop

importSideEffects "./game.styl"

The interesting line here is the final one where we import game.styl. This is our Stylus CSS file. Importing it like this will ensure webpack will compile it to CSS and include it in our final bundle – to do this I’ve used the stylus-loader package for webpack.

If we skip to the end of the file we can see a block of code that starts up a Fable Elmish based React app:

Program.mkProgram init update root
|> Program.toNavigable (parseHash Router.pageParser) urlUpdate
#if DEBUG
|> Program.withConsoleTrace
|> Program.withDebugger
#endif
|> Program.withReactBatched "trek-app"
|> Program.run

We’re passing in a whole load of stuff to this startup block – init, update, root, pageParser and urlUpdate are the basic building blocks of our Elmish app. And so I guess its time I answered the question: what is Elmish?

Elmish…

… is a set of abstractions that allow us to implement the Model View Update pattern in F# based on Elm. Essentially its a pattern where a user interface (a view) is created from immutable state and from which messages are passed back to our program to update the state (via a transformation – its immutable) and regenerate the view. To make this work their are a number of concepts which I’ve started to flesh out in our game.

Thomas Bandt has written a blog post around a simple counter example that introduces the same concepts that is worth reading before continuing. I’m going to go through the same concepts but using the game we’re creating which is a little more complex as we have more data to model and in our game I’m subdividing the system into smaller sub-applications.

Model

The model contains our application state and the best way to express this in F# is using a record. You can see our applications top level model in our App.Types.fs file:

type Model =
  {
    CurrentPage: Router.Page
    StartScreen: Interface.StartScreen.Types.Model option
  }
  static member Empty =
    { CurrentPage = StartScreenPage
      StartScreen = Some Interface.StartScreen.Types.Model.Empty
    }

Our root model keeps track of the current page we’re looking at (based on a URL – we’ll look at the router later) and the state for our sub-applications of which we currently only have one – the start screen. These are optional pieces of state that we create as required as the URL changes. I’ve added a static member that returns an empty model that we can use when we need to initiate a default model.

Being records the state is immutable and we’ll look at how we manage updates to this a little later.

The StartScreen model is currently just a placeholder which we’ll flesh out in later parts.

Messages

Messages are what we use to glue our system together. They’re typically sent by the user interacting with our views through a dispatcher and are handled by update functions that we’ll look at in a moment. Each of our sub-applications will have its own set of messages only visible within its own scope – this makes for a great way to isolate the moving parts of a system and is particularly useful in large systems like my cycling analytic website. It means I can change one sub-application without worrying about breaking others.

In our game you can find the messages for the start screen sub-application in Interface/StartScreen/Types.fs:

type StartScreenMsg =
  | NewGame

When we flesh out our start screen this message will be dispatched when the user clicks a new game button.

Discriminated unions are almost tailor made for messages. If you come from a C# background you might think they look like an enumerated type but they are much more! For one thing they can be associated with payloads and we already have an example of this – we use a top level set of messages that themselves encapsulate our sub-application messages to enable our program to route messages to the correct sub-application. You can see an example of this in App.Types.fs:

type Msg =
  | GameScreenDispatcherMsg
  | StartScreenDispatcherMsg of Interface.StartScreen.Types.StartScreenMsg

Updates

Update functions are how we respond to messages and update our state however they never modify state. Instead given the current state and a message they return new state and a command (often another message).

We don’t yet have a simple example of this but we do have an example of an update function coordinating between our sub-applications which you can find in App.State.fs:

let update msg model =
  match (msg, model) with
  | (StartScreenDispatcherMsg subMsg, { StartScreen = Some extractedModel }) ->
    let (subModel, subCmd) = Interface.StartScreen.State.update subMsg extractedModel
    { model with StartScreen = Some subModel}, Cmd.map StartScreenDispatcherMsg subCmd
  | _ ->
    console.error("Missing match in App.State")
    model, Cmd.none

If you’re not familiar with F# you might currently be asking what is this crazy wizardry. I’ll try and break it down! F# has great support for pattern matching – we begin a match set using the match with construct. In our case we’re saying match the msg and model together (what we’re actually doing is creating a tuple out of the message and the model).

Each pattern for consideration, they are evaluated in order, is started with the pipe | operator and in our case we have two possible matches.

Our first pattern match we look for a message of type StartScreenDispatcherMsg and a model that has the StartScreen attribute set to Some. While matching we can also extract values – in our case we’re extracting the sub message for the start screen and the model we have assigned to StartScreen. If we find these things then we pass them on to to our sub-applications updater – it also returns a model and a command. Finally we return a model with the new submodel returned by our child updater and whatever command it returned.

Our second match (the one that reads | _) is our fall through match. This will match anything and simply return the model and the command but pop an error into our browsers console. I’ve got no implementation at all yet for the GameScreenDispatcherMsg.

Routing

I briefly mentioned routing earlier when we looked at models – routing being the process of displaying the correct content within a SPA for a given URL. Elmish comes with some support for routing which I’ve used to build the router here which you can find in Router.fs. Firstly we use a disciminated union to define our routes:

type Page =
  | StartScreenPage
  | GameScreenPage

If we had sub-routes we could use the payload of a discriminated union to nest them but we don’t (at least not yet) so for now that’s it. Next we need a way to turn out union members into URL paths:

let private toHash page =
  match page with
  | StartScreenPage -> "#/"
  | GameScreenPage -> "#/game"

Here I’m using hash based paths but you can also use full paths. Finally we need a parser – a function that can extract values from routes and return a correctly structured Page discriminated union. We don’t have any parameters for the routes yet so this is quite simple:

let pageParser =
  oneOf [
    map GameScreenPage (s "game")
    map StartScreenPage top
  ]

Finally when a URL changes we need a way of updating the current page and state in our model. In App.State.fs we have a urlUpdate function:

let urlUpdate (result: Option<Router.Page>) model =
  match result with
  | None ->
    console.error("Error parsing url: " + window.location.href)
    model, Router.modifyUrl model.CurrentPage
  | Some page ->
    let model = { model with CurrentPage = page}
    match page with
    | StartScreenPage ->
      let (subModel, subCmd) = Interface.StartScreen.State.init () 
      { model with StartScreen = Some subModel }, Cmd.map StartScreenDispatcherMsg subCmd
    | _ -> model, Cmd.none

This is very similar in form to a regular update function except rather than take a message in takes our page discriminated union. Like the regular update it returns an updated model and command.

Views

Ok. With all that plumbing in place we need a way of transforming our state into user interface and we do that with views. Our root view can be found in App.fs:

let root model dispatch =
  div [Class "container"] [
    match model with
    | { CurrentPage = Router.Page.StartScreenPage ; StartScreen = Some extractedModel } ->
      Interface.StartScreen.View.root model dispatch
    | _ -> div [] [str "not found"]
  ]

Like much of our code so far this is somewhat infrastructural – it looks at our model, determines the current sub-application based on the route, and delegates its handling down to that (which you can find in Interface/StartScreen/View.fs):

let root model dispatch =
  div [Class "startScreen"] [
    div [Class "title"] [str "< work in progress >"]
  ]

If you come from a typical React background you’re probably used to using JSX – a DSL that is extremely similar to HTML. In F# we use a DSL that is, well, F#. Its still very similar in use but being F# is typesafe and because its F# you don’t have those slightly awkward breaks between JSX and JavaScript. We’ll see later on how easy it is to use with FP techniques to create complex interfaces cleanly.

Styling with Stylus

I’m building the CSS by hand for this project and to help me do that I’m using a preprocessor called Stylus. I like it because it removes a lot of the noise and clutter from a CSS file. You can find the, fairly limited, amounts of CSS in our game.styl file.

For the time being I’m referring to class names by strings but I may do something about this as we progress 🙂

Putting it all together

If we wind back to where we started and look at the block of code at the bottom of App.fs:

Program.mkProgram init update root
|> Program.toNavigable (parseHash Router.pageParser) urlUpdate
#if DEBUG
|> Program.withConsoleTrace
|> Program.withDebugger
#endif
|> Program.withReactBatched "trek-app"
|> Program.run

You can see how all these bits we’ve looked at are brought together in the first two lines of this to create our Elmish program that can now parse URLs, update models, and translate models into views.

Deploying to Azure Static Web Hosting with GitHub Actions

Right back at the start of this piece I shared a link to the game running live on the web – you can find it at https://www.fabletrek.com. Its not all that exciting at the moment:

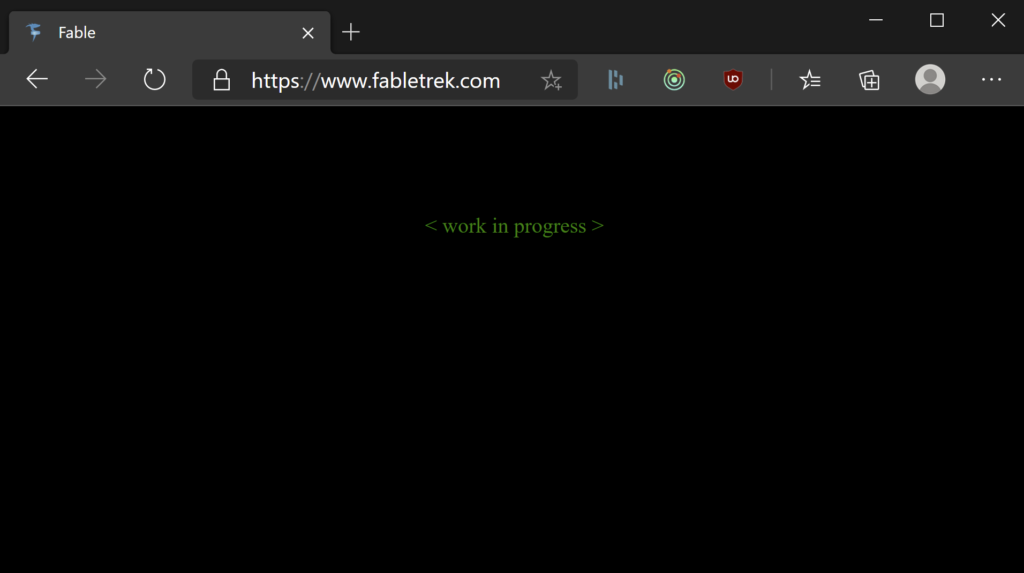
But it is running – and its deploying automatically and directly of the GitHub repository using GitHub Actions and Azure Static Web Apps. This solution doesn’t come with automatic support for Fable but its pretty straightforward to add.

Start by creating the Azure Static Web App itself in Azure following these instructions. For the app artifact directory enter deploy but otherwise follow those instructions.

This will create a GitHub Action for you in the repository but if you run it you’ll get an error stating that the job they provide doesn’t know how to build out code. Their is support for using a custom build command (and we build our solution with the command yarn webpack) but I found using that gives an error with locating and running dotnet from within the Fable compiler webpack loader.

Instead what we need to do is move the build outside of their job so all we need to then do is pick up the contents of our deploy folder. To do that we add these steps:

      - name: Setup .NET Core
        uses: actions/setup-dotnet@v1
        with:
          dotnet-version: 3.1.402
      - name: Install .NET dependencies
        working-directory: "src"
        run: dotnet restore
      - name: Install JS dependencies
        run: yarn install
      - name: Build
        run: yarn webpack

This makes sure the correct version of .NET Core is installed, restores our NuGet and NPM packages, and then finally builds the solution.

We then need to modify the provided Azure Static Web App job to prevent it from trying to build the solution again. Their is no way to disable the build process but what you can do is supply it with a harmless build command – rather than build anything I simply run yarn –version:

         with:
          azure_static_web_apps_api_token: ${{ secrets.AZURE_STATIC_WEB_APPS_API_TOKEN_UNIQUE_FOR_YOU }}
          repo_token: ${{ secrets.GITHUB_TOKEN }} # Used for Github integrations (i.e. PR comments)
          action: "upload"
          ###### Repository/Build Configurations - These values can be configured to match you app requirements. ######
          # For more information regarding Static Web App workflow configurations, please visit: https://aka.ms/swaworkflowconfig
          app_location: "/" # App source code path
          api_location: "api" # Api source code path - optional
          app_artifact_location: "deploy" # Built app content directory - optional
          # we need a separate build step as the fable-compiler fails when run under the context of the static site builder
          # and their is no disable build property that I am aware of so we run a harmless command
          app_build_command: "yarn --version"
          ###### End of Repository/Build Configurations ######

With those changes made every time you commit code to your branch it will be built and deployed. You can find the complete action here. I then added a custom domain which gives you a free SSL cert too.

Next Steps

That’s the setup part done really – if you’re new to Fable, F# and Elmish then this I think is the more complex bit. In the next stage we’ll build out a start screen and get to the point where we can start a new game.

Token Authentication with F#, SAFE and Fable Remoting

If you read my last post you’ll know I’ve been doing some work in the SAFE stack recently with F# – inevitably this eventually required me to tackle authentication and authorization. I’m using an Open ID Connect identity provider (Auth0 in my case) to externalise all that complexity but I still needed to hook this up.

My application architecture is based around using Fable Remoting (on top of Saturn and Giraffe) to abstract away HTTP and simplify my development experience (this is very much a spare time project and so time is at a premium and productivity trumps all else) and while there is a lot of documentation on the various parts I noticed a few things:

  1. A lot of my reading boiled down to a manual check inside my API implementations, problem with is at some point I’m going to forget and it makes for messy code. I don’t really want my business logic to be polluted with token validation and claims extraction.
  2. I struggled to find anything that really covered an end to end approach to authentication and authorization with access tokens and being fairly new to Saturn, Giraffe and Fable Remoting their was a lot of concepts to cover and unpick.

That being the case I thought I’d write about the approach I eventually took here. Note this isn’t a guide to OAuth / Open ID Connect and the rest of this post assumes a basic knowledge of token based authentication schemes.

Server

First off consider my Saturn application block:

let app = application {
    url ("http://0.0.0.0:" + port.ToString() + "/")
    use_router completeApi
    memory_cache
    use_static publicPath
    use_gzip
}

Its basically the out the box SAFE implementation. I wanted to leverage the existing Saturn / Giraffe / ASP .NET Core framework for actually validating tokens – that’s a robust and well tested infrastructure and it seems somewhat foolish to not leverage it. That means I didn’t a way to add the configuration for the ASP .NET Core authentication packages based on the Auth0 guidance.

You can do this by extending the Saturn DSL which is basically a wrapper over the familiar ASP .NET Core authentication packages. I added a keyword use_token_authentication which you can see below:

type Saturn.Application.ApplicationBuilder with
  [<CustomOperation("use_token_authentication")>]
  member __.UseTokenAuthentication(state: ApplicationState) =
    let middleware (app: IApplicationBuilder) =
      app.UseAuthentication()

    let service (s : IServiceCollection) =
      s.AddAuthentication(fun options ->
        options.DefaultAuthenticateScheme <- JwtBearerDefaults.AuthenticationScheme
        options.DefaultChallengeScheme <- JwtBearerDefaults.AuthenticationScheme
      ).AddJwtBearer(fun options ->
        options.Authority <- sprintf "https://%s/" domain
        options.Audience <- audience
        options.TokenValidationParameters <- TokenValidationParameters(
          NameClaimType = ClaimTypes.NameIdentifier
        )
      ) |> ignore
      s

    { state with ServicesConfig = service::state.ServicesConfig ; AppConfigs = middleware::state.AppConfigs ; CookiesAlreadyAdded = true }

You’ll need to ensure you have the NuGet packages Microsoft.IdentityModel.Protocols.OpenIdConnect and Microsoft.Extensions.DependencyInjection.Abstractions included in your project for the above.

With that in place I can make use of this in my application builder:

let app = application {
    url ("http://0.0.0.0:" + port.ToString() + "/")
    use_token_authentication
    use_router completeApi
    memory_cache
    use_static publicPath
    use_gzip
}

Like many APIs mine is a mix of endpoints requiring authentication and a few endpoints that don’t. For example I have an authentication endpoint for handling token exchange in the authentication code flow. I also have enough endpoints that I wanted to separate them out into multiple sub-domains for a cleaner “not one giant file” implementation and so I’m using Fable Remotings multiple protocol support to compose my APIs as shown below:

let buildApi () =
  Remoting.createApi()
  |> Remoting.withRouteBuilder Route.builder
  |> Remoting.withErrorHandler errorHandler

let lookupApi =
  buildApi ()
  |> Remoting.fromValue LookupApi.implementation
  |> Remoting.buildHttpHandler

let businessLogicApi =
  buildApi ()
  |> Remoting.fromValue BusinessLogicApi.implementation)
  |> Remoting.buildHttpHandler

let completeApi = choose [
    authenticationApi
    businessLogicApi
]

In this example its the business logic API that I want to require authentication and make use of a user ID extracted from a claim (the subject claim), and in fact nearly all my authenticated APIs have the same requirements.

Many examples I’ve seen pass the token as a parameter, for example:

type IBusinessLogicApi =
  { getAll: AccessToken -> Async<Invoice list>
  }

I dislike this for the reasons mentioned earlier – I can’t leverage the well tested ASP. NET Core framework and although it makes the fact that the function requires an access token clear it means I also have to remember to code the handling of the access token. We could use function injection and currying to help but these are still things we could easily miss. Whereas if authentication is baked into our HTTP handling chain we can’t make these mistakes.

My solution to this was to use Fable Remotings ability to create an API implementation based on the HTTP context using a factory approach combined with Saturn’s “pipeline” support.

Firstly I defined my API interface without the access token:

type IBusinessLogicApi =
  { getAll: unit -> Async<Invoice list>
  }

Next I provided an implementation for this via a function that accepts a user ID as a parameter and therefore makes it available to the contained implementation:

let implementation (userId) = {
  getAll = fun () -> async {
    Database.getInvoices userId
  }
}

And now I need a HTTP request context aware factory for this implementation that is able to pull the user ID from the subject claim:

let createAuthorized (authorizedImplementation : string -> 'apiinterface) (context:HttpContext) =
  let claim = context.User.FindFirst(ClaimTypes.NameIdentifier)
  claim.Value |> authorizedImplementation

With our authentication handled by ASP .NET then after successful token validation the builder will be called and the HttpContext will contain a claims principal.

With all this in place I can modify my API to be constructed using this factory rather than from a value:

let businessLogicApi =
  buildApi ()
  |> Remoting.fromContext (createAuthorized BusinessLogicApi.implementation)
  |> Remoting.buildHttpHandler

And finally I need to make a change to my API composition so that this API has the authentication step run before it:

let completeApi = choose [
  authenticationApi
  pipeline {
    requires_authentication (Giraffe.Auth.challenge JwtBearerDefaults.AuthenticationScheme)
    businessLogicApi
  }
]

And we’re done on the server. With these components the routes we want protected are protected and our implementations can stay clear of protocol related concerns.

Client

If we’re not passing the token as a parameter then how do we pass it as a header? Fortunately Fable Remoting has built in support for this and a naive implementation would look as follows:

let authorizationToken = "Bearer abcdefg"

let businessLogicApi : IBusinessLogicApi = 
    Remoting.createApi()
    |> Remoting.withAuthorizationHeader authorizationToken
    |> Remoting.buildProxy<IBusinessLogicApi>

The problem with this is that your token is highly unlikely to be a constant! Fortunately we can again use a higher order function to provide a dynamic token as illustrated in the Fable documentation:

let createBusinessLogicApi () =
  Remoting.createApi()
  |> Remoting.withAuthorizationHeader (tokenProvider.Token ())
  |> Remoting.withRouteBuilder Shared.Route.builder
  |> Remoting.buildProxy<IBusinessLogicApi>

let businessLogicApi (f: IBusinessLogicApi -> Async<'t>) : Async<'t> =
  async {
    // can do a token refresh here if required
    return! f (createBusinessLogicApi ())
  }

This necessitates a minor change in how we now call our APIs as per the example below:

let! response = businessLogicApi(fun f -> f.getAll ())

Again this now leaves the majority of our application code free from worrying about access tokens.

Wrapping Up

Hopefully the approach presented above is helpful. If you’re familiar with Giraffe, Saturn and Fable Remoting this may be fairly obvious stuff but as a newcomer it did take some time to figure out an approach that worked.

Its likely to evolve somewhat over time and as I learn more and if so I’ll revisit and update.

SAFE Adventures in F#

With my recent role change I’m getting most of my coding kicks for fun these days – which means I’m working almost entirely on OSS and get to play around with whatever takes my fancy! Exploring Fable and the broader SAFE stack has been on my list of things to do for some time and so this last weekend I dove in and got started building something simple.

If you’ve not come across the SAFE stack before its an entirely open source community driven end to end web development framework for F# that takes a functional first approach that brings together a number of projects:

  • Saturn – a web development framework that is ultimately running on top of ASP .Net Core
  • Azure – Microsoft’s cloud hosting platform. Doesn’t really “come” with SAFE (I think someone was reaching to make a cool name!) but it is a natural companion.
  • Fable – A F# to JavaScript transpiler.
  • Elmish – a set of abstractions for writing user interfaces in F#. Fable and Elmish come pre-configured with React bindings. Yes – you can write React apps in F# and using very familiar patterns.

Its worth noting that the excellent Fabulous framework, for mobile apps based on Xamarin Forms, also makes use of Elmish and I think makes a natural companion to the SAFE stack.

While I don’t intend to write an end to end tutorial I thought it would be useful to highlight some of the challenges I faced getting started and solutions I found. This will be a bit of a grab bag but lets dive into it…

Getting Started

Before you begin there are a few tools its useful to have ready. Firstly Visual Studio Code and Ionide are very useful for working on F#. Ionide is an open source community extension for VS Code and while I prefer to work on server side / backend code in Rider it contains some useful tools for working with Fable. We’ll come to my embryonic workflow later!

For now – ensure you’ve got Visual Studio Code and the Ionide extension for it. You’ll also want to have .NET Core 3 installed.

With all that done you can get started with your first SAFE project. There’s little point me repeating the documentation – to get started with a new project just follow the simple instructions on the SAFE website.

Working With The Solution

My first stab at working with the solution was to open it in Rider – my preferred IDE for all things .NET. It does all open but you need to do some work to get it to compile and run the client and I haven’t yet managed to get it debugging the client.

Next stop was VS Code which does work quite nicely – the out the box project includes all the configuration for VS Code to compile and run both server and client with an end to end debugging experience. Great! Except….

I found it a bit confusing and noisy having everything in one project. The console output is excessive and not well delineated and generally its just too much for my brain to deal with. It could be something I get used to in time but I’m fairly used to having my client code in VS Code and my backend code in Rider.

It was super simple to create two new solutions from the shipped sln file – one for client and one for server – and then I could work in a pattern I found more comfortable.

Custom HTML Attributes

Sooner or later you’ll come across a piece of HTML / JavaScript that makes use of custom attributes on HTML tags, for example “x-data”. Given that Fable-React makes use of a type safe discriminated union for HTML attributes how do we do this? Handily their is a member of the union called Custom so you can write something like:

div [Custom("x-data", "somevalue") ; ClassName="my-class"] []

Converting HTML To Fable Elmish

Fable uses functions to represent HTML elements and while this closely resembles HTML itself it does take a different form and at some point you’re going to want to convert a large piece of HTML to Fable.

That wouldn’t be fun, but fortunately you don’t need to do this by hand! There is an online tool available that you can post HTML into and out will pop the Elmish verison.

Alternatively this is also built into Ionide and you can do the conversion right their in Code:

Introducing Tailwind CSS

The SAFE template ships with Fulma for CSS – a F# wrapper for the Bulma CSS framework. However I’m already used to working with Tailwind (having moved away from Bootstrap) and I didn’t really want to learn / adopt another CSS toolkit so wanted to introduce this. Reasons why I like Tailwind are well articulated, not by me, here.

I confess I’ve not had any luck introducing it into the FAKE and webpack build chain for Fable. I’m certainly not an expert on either of those tools and so am likely hitting the limits of my knowledge rather than a fundamental issue (and were I not doing this project for fun I’d keep banging away until I’d solved it – but frankly other things to be doing!).

In the end I had to settle for a simple npx based approach that pre-generates the CSS. Not ideal but it works.

Routing / Endpoints

Creating endpoints is ridiculously simple in Saturn as you can see from this code:

let webApp = router {
    get "/api/init" (fun next ctx ->
        task {
            let counter = {Value = 42}
            return! json counter next ctx
        })

There’s no reason C# ASP .NET Core can’t be this simple (and in fact David Fowler recently posted an example of how it can be) but Microsoft have chosen the “way of pain” in most of their example code and templates and so ASP .NET Core code tends to, well, not be simple even for simple scenarios. In any case I appreciate the simple approach in the SAFE stack.

If you’ve made the journey from C# to F# you’ve probably gone through the same “wait… what… how…” in terms of the async changes. And there’s a fair chance that like me once you’ve figured the differences and what’s going on you’ve come to rather like the F# approach with its async { } computation expressions.

To ease interop with the rest of the .NET world Saturn uses a task { } block rather than F# async blocks. Practically speaking it doesn’t change much, for me at least, I prefer my domain code to be protocol agnostic and somewhat agnostic and so my Saturn endpoints are simple wrappers around functions which I continue to use async with.

Just caught me by surprise.

Serialization with Thoth

Under the covers SAFE is using Thoth to handle serialization. I’ve only just started to explore this. Mostly it seems to work as you’d expect just be aware that you need to return concrete collection types from routes. If you return a seq you’ll get an error like this at runtime:

Cannot generate auto encoder for Microsoft.FSharp.Collections.IEnumerator+mkSeq@132[[Shared.Api+Lift, Server, Version=1.0.0.0, Culture=neutral, PublicKeyToken=null]]. Please pass an extra encoder.

SQL Access

I’ve not done much SQL work from F# to date but I needed to in the context of the small project I’m building. I went scouting around for different ways of doing this and Twitter came to my rescue with a lot of suggestions.

In general I like to keep this simple and I don’t like DSLs in this space. I always find them a poor abstraction over SQL itself and one that simulatenously offers little value but a fair amount of risk: you have to second guess the SQL that is being generated. If I had a pound for every time I’ve been asked to fix performance issues that turned out to be due to this… well I’d have made enough to offset my stock market losses this week!

As a result with C# I generally use Dapper. There is a project that purports to wrap this in a F# friendly way in FSharp.Data.Dapper but it seems to have some pretty basic bugs (I couldn’t get it to run at all against SQL Server – open a connection first and it complains about that, don’t open a connection and it complains the connection is closed – I gave up). I was just about to write my own wrapper based on some work I did with Cosmos when I came across a handy gist:

I extended this with some async methods and that was me done.

In Summary

The F# community have created, and made very accessible, a fantastic set of tools that allow you to write F# end to end on the web and in a way that embraces the existing world and ecosystems rather than by trying to create its own new world (I’m looking at you Blazor). I’ve been able to take my F# knowledge and React knowledge and quite easily combine the two to be productive fast.

I’m looking forward to exploring this further over the next few weeks and will certainly write a new post as I learn more and as I find solutions for the things I currently have unresolved here.

Contact

  • If you're looking for help with C#, .NET, Azure, Architecture, or would simply value an independent opinion then please get in touch here or over on Twitter.

Recent Posts

Recent Tweets

Invalid or expired token.

Recent Comments

Archives

Categories

Meta

GiottoPress by Enrique Chavez