Category: AngularJS

How To: Publish an AngularJS Website with Azure Resource Manager Templates

I’ve recently been working on the deployment of some fairly complex micro-service projects using the new Azure Resource Manager and in the Microsoft space everything went fine, it’s all pretty self-explanatory, there’s some useful tooling in Visual Studio and some great quick-start templates.

Then I hit my UI layer. This is an AngularJS app which I prefer to work on outside of Visual Studio – I like to use the best tools for the job and while I definitely find Visual Studio is just that for C# and other Microsoft native technologies I find it often lags behind in the web space, though it’s got and continues to get a lot better.

Basically I have a folder in my project folder space (not in the .sln file) containing my AngularJS app and a bunch of typical web tools to run the build and packages: npm, bower and grunt. For various reasons although the project source is in GitHub I couldn’t (without a fair bit of hassle) deploy directly from their using the source code deployment model.

And so how do you publish a folder of files to an Azure website using Azure Resource Manager?

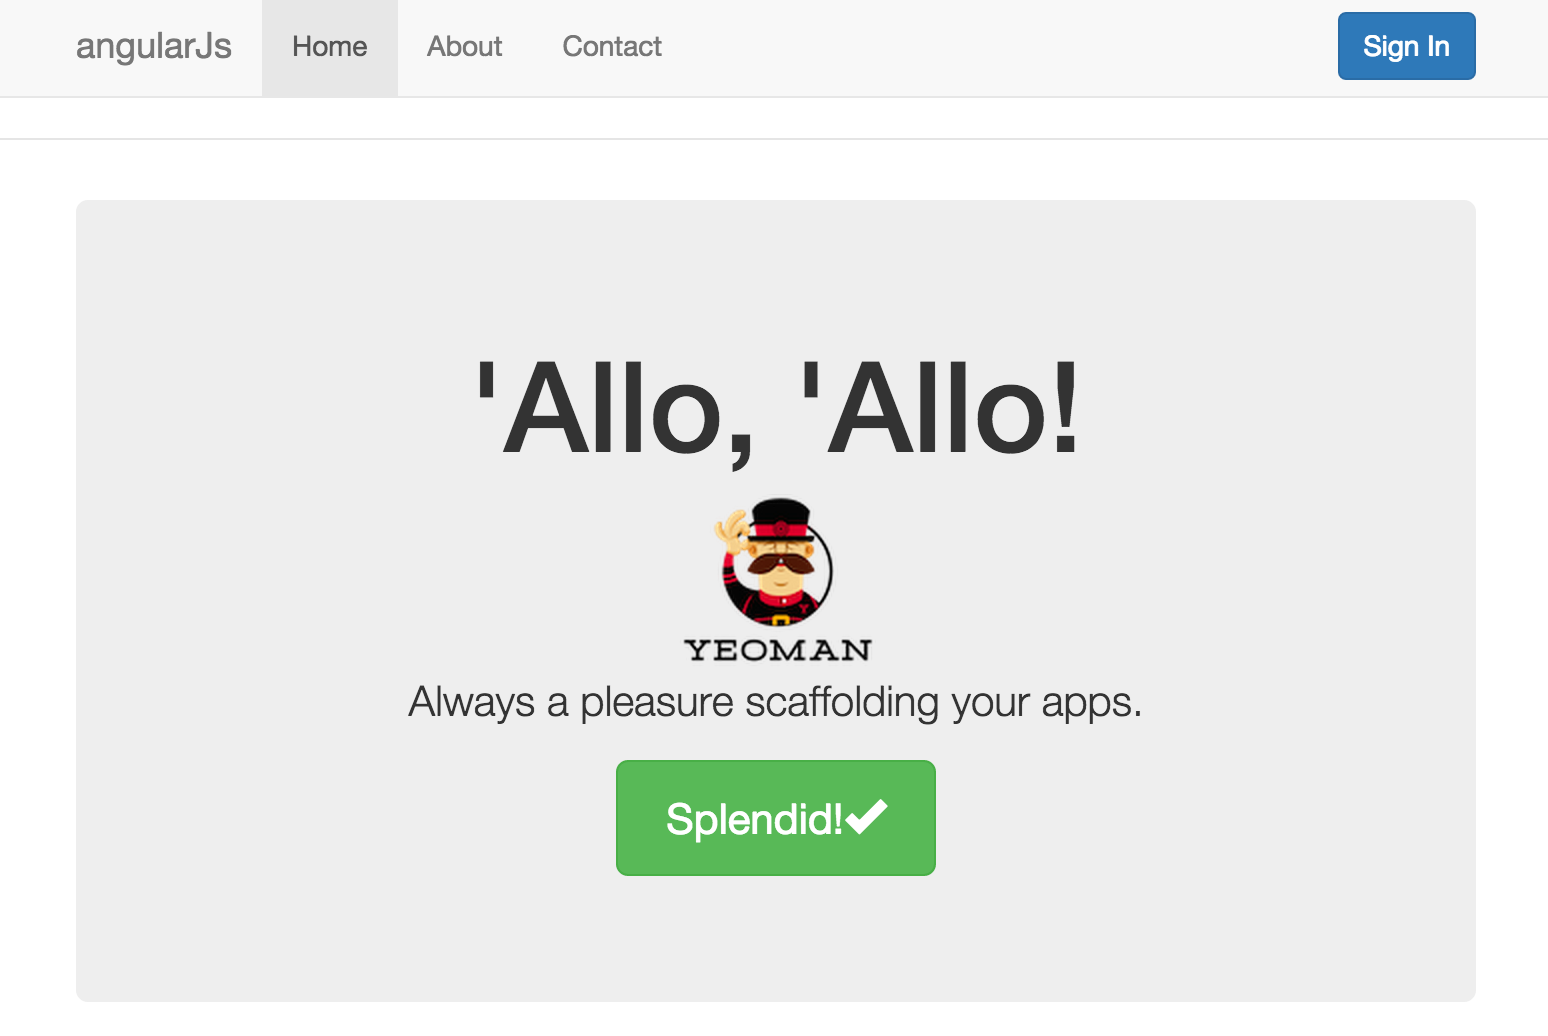
Below I’ll present one way using the Yeoman generated Angular template as a sample which, using grunt, builds to a folder called dist. As a prerequisite for this you’ll need Azure Powershell -I’m using 0.8 at the time of writing (1.0 contains some changes to the Azure Resource Manager cmdlets but as I write this it’s in preview, the changes are nothing earth shattering).

You can find source code for the below in GitHub.

Firstly you need to create an Azure Resource Manager template – the one we’re using is here. I’ve not going to cover every bit of this as Microsoft have plenty of documentation and samples however it’s worth looking at this bit towards the end:

"resources": [
  {
    "name": "MSDeploy",
    "type": "extensions",
    "location": "[parameters('location')]",
    "apiVersion": "2014-06-01",
    "dependsOn": [
      "[concat('Microsoft.Web/sites/', parameters('siteName'))]"
    ],
    "tags": {
      "displayName": "ContentDeploy"
    },
    "properties": {
      "packageUri": "[concat(parameters('packageUrl'), parameters('sasToken'))]",
      "dbType": "None",
      "connectionString": "",
      "setParameters": {
          "IIS Web Application Name": "[parameters('siteName')]"
      }
    }
  }
]

This invokes the deployment of a Web Deployment package at URL specified by packageUrl. I’m using an Azure Storage Account for this and so to access the package do so we need a Shared Access Signature which we’ll see how to generate later.

As I want to automate everything I’ve also got a template for creating a storage account into which the package can be uploaded and you can see this template here.

I’m going to glue these two templates together with a Powershell script using the Azure Powershell cmdlets. To get started with this launch Azure Powershell and before running any scripts add your Azure subscription:

Add-AzureAccount

You’ll be prompted to log into your account.

The Powershell script I’m using to glue all this is called deploy.ps1 and you can find it here. I’m going to break this down section by section. Firstly we just deploy a bunch of fairly (if you know Azure) self explanatory settings – the hosting plan, resource group, website and storage account to create / use and the location of those resources:

# Deployment settings
$hostingPlanName = "ArmAngularSampleHostingPlan"
$resourceGroupName = "ArmAngularSample"
$storageAccountName = "armangularsamplesa"
$location = "West Europe"
$siteName = "ArmAngularSampleWebsite"

Then we optionally select an Azure subscription (if you only have one subscription you won’t need to do this) and switch Powershell into Azure Resource Manager mode.

# Configure Azure and the Powershell shell
# Select-AzureSubscription -SubscriptionId {{your-subscription-id}}
Switch-AzureMode AzureResourceManager

Now we create the resource group within which our templates are going to run:

# Create Azure Resoure Group
New-AzureResourceGroup -Name $resourceGroupName -Location $location -Force

Next we deploy our storage resources using Azure Resource Manager and then we get hold of the access key – we’ll need that in a minute. In such a small deployment this split of storage and service might seem a little naive but in more complex scenarios it’s fairly common to do a bunch of work on storage before deploying updated services (and vice versa):

# Deploy storage
New-AzureResourceGroupDeployment -ResourceGroupName $resourceGroupName `
                                 -Name AzmSampleStorageDeployment `
                                 -TemplateFile "storagedeploy.json" `
                                 -appStorageAccountName $storageAccountName 				 
$storageAccountKey = (Get-AzureStorageAccountKey -ResourceGroupName $resourceGroupName -Name $storageAccountName).Key1

Having done that we get grunt to build a distribution version of our Angular site and then we invoke MSBuild to create a deployment package from the folder. To do this MSBuild needs a project file and nearly every example you see will use a .csproj file – which is fine if you’re using Visual Studio but what if we’re not? Well you can also use a .publishproj file which you can find here. This file is absolute boilerplate – it will work for any folder and so you can copy and use mine for your own projects. We need to move this into the dist folder that grunt has created (you can use it elsewhere but as dist is cleaned each time this is easiest).

# Build deployment package
grunt build
cp .\website.publishproj .\dist\website.publishproj
C:\"Program Files (x86)"\MSBuild\14.0\bin\msbuild.exe .\dist\website.publishproj /T:Package /P:PackageLocation="." /P:_PackageTempDir="packagetmp"
$websitePackage = ".\dist\website.zip"

The setting of /P:PackageLocation=”.” causes the package to be dropped in the dist folder and the /P:_PackageTempDir=”packagetmp” causes MSBuild to use a packagetmp subfolder of dist to be used for temporary files – this can be useful as it’s easy to run into the “classic” Windows file length issues otherwise (it will use a temp location in AppData by default).

Having generated a package (called website.zip and located in the dist folder) we need to upload it to somewhere Azure can access. I’m using the storage account we created earlier. So that the Azure Resoure Manager incarnation of Web Deploy can access the package we generate a Shared Access Signature with read privileges:

# Upload packages
$storageCtx = New-AzureStorageContext -StorageAccountName $storageAccountName -StorageAccountKey $storageAccountKey
if (-Not (Get-AzureStorageContainer -Context $storageCtx | Where-Object { $_.Name -eq "packages" }) ) {
    New-AzureStorageContainer -Name "packages" -Context $storageCtx -Permission Off
}
Set-AzureStorageBlobContent -File $websitePackage -Container "packages" -Blob website.zip -Context $storageCtx -Force
$uploadedPackage = "https://$storageAccountName.blob.core.windows.net/packages/website.zip"
$sasToken = New-AzureStorageContainerSASToken -Container "packages" -Context $storageCtx -Permission r
$sasToken = ConvertTo-SecureString $sasToken -AsPlainText -Force

And finally we deploy our services via the Azure Resource Manager template we saw earlier:

New-AzureResourceGroupDeployment -ResourceGroupName $resourceGroupName `
                                 -Name AnalyticsLiveServiceDeployment `
                                 -TemplateFile "azuredeploy.json" `
                                 -hostingPlanName $hostingPlanName `
                                 -location $location `
                                 -siteName $siteName `
                                 -packageUrl $uploadedPackage `
                                 -sasToken $sasToken

And that’s it. If you run .\deploy.ps1 (you’ll need to set your own unique storage account and website name) then as long as you have an Azure subscription this will deploy and you’ll be able to see the Yeoman template running in Azure.

Hopefully that’s helpful and will save you some of the pain that always seems to come with the territory of deployment – particularly where MSBuild is involved!

AngularJS, IdentityServer3 and OAuth2 Plugin Sample

By popular(ish) demand I’ve published to GitHub a sample that demonstrates using my OAuth 2 Angular plugin (also hosted on GitHub) requesting tokens from IdentityServer3 and using them to access protected Web API resources.

The sample can be found on GitHub and should be pretty easy to get running as long as you have the pre-reqs (npm, git, grunt and bower primarily):

  1. Open the SLN file in Visual Studio and start both projects.
  2. Open a NodeJS command prompt and navigate to the UI folder.
  3. Type “bower install” to install the plugins.
  4. Type “grunt serve” to run the Angular app.

The identity server is prewired with a single user account details as follows:

Username: auser
Password: password

It should be noted that this is illustrative code, particularly in the C# projects, and it’s been written as such. I didn’t want to cloud the example with dependency injectors and other such components.

Thanks to everyone for their comments, questions, and feedback on the plugin both here and on GitHub.

Authenticating AngularJS against OAuth 2.0 / OpenID Connect

I’ve recently found myself doing quite a bit of work putting in place an STS (Security Token Service) based around the excellent Thinktecture IdentityServer 3. I have a variety of different client types that need to authenticate including JavaScript Single Page Applications using the AngularJS framework.

IdentityServer 3 implements the Open ID Connect protocol for clients to authenticate against, Open ID Connect being an extension to OAuth 2.0.

There’s an existing open source plugin for authenticating with OAuth 2.0 called oauth-ng that utilises the implicit authentication flow that I wanted to use however I wanted some different behaviour and was interested in implementing my own plugin as a learning exercise with the protocol itself and with AngularJS. Massive credit to the author of that plug-in for inspiration and readable code, this is the first non-trivial AngularJS directive I’ve developed and so it was incredibly useful to be able to look at oauth-ng and riff off it’s design. As another reference the Adal-Angular project was also really useful.

The main features of the plugin I’ve developed are:

  • Sign in / sign out button
  • Specify which routes require a token for access to protected resources and automatically handle sign in if required when they are accessed
  • Storage of the token in the browsers session storage via the ngStorage module
  • Automatic insertion of a bearer token into HTTP requests once a user has authenticated

The plug-in can be found on GitHub here. It works and I’ve tested it against both Thinktecture IdentityServer3 and Google’s OAuth2 endpoint but is still quite early code in terms of testing and so if you encounter any issues please do log them on the GitHub issues page or submit a pull request with a fix.

All the code samples given below are from the sample app which is basically the Yeoman generated scaffold and that you can find on GitHub here and which I’ve configured to authenticate directly against Google. You will need to obtain your own client ID and configure Google as per the instructions here.

Getting Started

You can either grab the scripts from GitHub or, more easily, install the plugin as a bower package which you can install as follows:

bower install angularjs-oauth2 --save

First you’ll need to add the module to your applications list of dependencies in app.js and you need to make sure that ngStorage is also included:

angular
  .module('angularJsApp', [
    'ngAnimate',
    'ngCookies',
    'ngResource',
    'ngRoute',
    'ngStorage',
    'ngSanitize',
    'ngTouch',
    'afOAuth2'
  ])

The default template that is supplied for the sign in / out button expects to be placed inside a bootstrap navbar.

Typically in the above example you would select a scope appropriate to the resource you wished to access (if that terminology is confusing then I have a series of blog posts on the way as an intro to Open ID Connect and OAuth 2.0) – I’ve just picked one that we’ll have access to without additional configuration.

Now let’s modify the app.js file so that clicking the About link will require the user to be signed in:

.config(function ($routeProvider) {
    $routeProvider
      .when('/', {
        templateUrl: 'views/main.html',
        controller: 'MainCtrl'
      })
      .when('/about', {
        templateUrl: 'views/about.html',
        controller: 'AboutCtrl',
        requireToken: true
      })
      .otherwise({
        redirectTo: '/'
      });
  });

Note the addition of requireToken:true to the route for about.

Now run the app (if you’re using the yeoman builder like myself then type grunt serve). You should see something much like the following appear in your browser:

indexScreen

The only difference from the standard Yeoman template (at least at the time I wrote this) is the Sign In button at the top right. If you click that, or the about link, then you should be redirected to the Google sign in page that looks like this:

signonSuccess

If you’ve not got things wired up “just so” in the Google console then you’ll see an error. Generally they are reasonably informative and normally, in my experience, the redirect URI in the console doesn’t quite match the redirect URI in the app (they’re sensitive over things like the / on the end or not).

After signing in the token will be added as an Authorization header to all http calls using the ‘Bearer my token’ format and so any calls you make to a remote resource that require authorisation will be supplied the token they need to verify the user.

Options

The oauth2 tag has a number of attributes that can be specified as follows.

authorisation-url: The URL to request the token from.
client-id: The client ID to supply to the token provider.
redirect-url: The URL the token provider should redirect to on a successful sign in.
response-type: Optional. The required token type. Defaults to token.
scope: The resources that access is requested to.
state: A magic number to send to the token provider to protect against CSRF attacks.
template: Optional. URL of a Angular template to use for the sign in / out button in place of the built in template.
buttonClass: Optional. Defaults to “btn btn-primary”. The class to apply to the button in the standard template.
signInText: Optional. Defaults to Sign In.
signOutText: Optional. Defaults to Sign Out.
signOutUrl: Optional. The URL to call to ask the token provider to perform a sign out. See notes on sign out below.
signOutAppendToken: Optional. Defaults to “false”. If set to “true” then the access token will be appended to the signOutUrl.
signOutRedirectUrl: Optional. The URL that the token provider, if it supports redirects, should redirect to following a sign out.

Signing Out

Signing out in the OAuth world can be… complicated. When the user presses the sign out button presented by this plug in the token that is stored in session storage is cleared and as we’re using session storage as soon as the session ends (window or tab closed) then they’ll be logged out.

However they may still be logged in with the token provider depending on how the token provider behaves and the options the user has selected their.

This plugin does allow a URL to be supplied to initiate a logout at the token provider where the token provider allows for that but if the token provider is using a persistent cookie and the user shuts the window without clicking sign out then they could remain logged in.

It’s worth thinking about if / when you choose to use OAuth.

Authenticating an AngularJS Single Page Application with Azure AD

I’ve been spending a lot of time in Angular JS of late with Web API serving up the data. Generally I’ve been authenticating with what Microsoft call “individual accounts” – usernames and passwords stored by the web service or through common logins such as Microsoft Accounts, Facebook etc.

However recently I had the need to authenticate such a pairing against Azure AD.

I must admit I expected a day or two of pain followed by a lengthy blog post but to my very pleasant surprise Microsoft have recently released a preview version of a JavaScript library and AngularJS module for doing just this.

The steps to take in Angular and AD are well documented on the GitHub page that you can find here.

Requiring the use of https on an AngularJS application hosted in an Azure Website

As I was reaching the tail end of my AngularJS coding challenge one of the tasks I had outstanding was to enforce the use of https across the site, even if a visitor accessed it via a http prefixed link.

For the last few years I’ve mostly been working in MVC and have done this selectively at the filter level (RequireHttps) but my Angular site was just a collection of client side files with no server component – that was hosted off in a second site that fronted up only a restful web API.

I’m familiar with the concept of URL rewriting from ages back but hadn’t used it (ever? or at least for as long as I can remember) on IIS / ASP.Net. Turns out it’s pretty simple to do, all I had to do was drop the block below into my sites web.config file:

1
2
3
4
5
6
7
8
9
10
11
12
13
14
15
16
17
18
19
20
<configuration>
  <system.web>
    <compilation debug="true" targetFramework="4.5.1" />
    <httpRuntime targetFramework="4.5.1" />
  </system.web>
  <system.webServer>
    <rewrite>
      <rules>
        <clear />
        <rule name="Redirect to https" stopProcessing="true">
          <match url="(.*)" />
          <conditions>
            <add input="{HTTPS}" pattern="off" ignoreCase="true" />
          </conditions>
          <action type="Redirect" url="https://{HTTP_HOST}{REQUEST_URI}" redirectType="Permanent" appendQueryString="false" />
        </rule>
      </rules>
    </rewrite>
  </system.webServer>
</configuration>

Handy to know if you’re deploying an AngularJS site to an Azure website or IIS.

Angular JS Pack

I’ve spent some time over the weekend and last week tidying up my initial AngularJS code and learning about some more advanced topics in order to reduce code repetition and standardise my approach to handling success and failure around $http calls to Web API.

Not being someone who is shy of creating new public GitHub repositories I’ve spun what I’ve written out into an open source (MIT License) Accidental Fish AngularJS Pack (how grand!) and written some documentation for it. You can find it over at GitHub.

It contains some element level directives for Bootstrap 3 boilerplate and some wrappers for communicating with Web API responses.

Code quality should improve over time as I learn more about AngularJS – I’m really only a beginner.

12 Hour Coding Challenge – AngularJS and Azure

This last weekend I set myself a challenge to build and ship a web application in under 12 hours and in the process learn something about AngularJS – a framework I’ve been itching to try for some time. I also wanted to build something that would serve as a basis for a small iOS application written in Swift (to learn a little about that) and that might allow for extension opportunities in iOS8.

The good news is I succeeded in my challenge and you can find the website here and the source code on GitHub. I’ll post more details on how to build, configure and deploy this application shortly.

Without further ado – this is how my day went.

Hour 1 – Idea, Technology Choices, System Architecture

With only 12 hours and some learning to do I needed something I could pair back to a useful absolute minimum but that I could evolve additional features on top of easily in the future. I used to be a big user of delicious but gave up on it while it was under Yahoo’s tenure. I have tonnes of different devices, on different platforms (so for example iCloud syncing of bookmarks isn’t enough for me iPhone and iPad yes but what about my Surface?) so thought I’d have a bash at a simple online bookmark site. I paired things back to a handful of requirements I thought I could achieve:

  • Signup and sign-in (in a way that I could expand to include social account sign in in a later version)
  • View links in descending order they were saved
  • Save links in the website
  • Save links from a bookmarklet (button on your browsers toolbar)
  • Tag links
  • View links in tags in descending order they were saved

As both AngularJS is new to me, and Swift also when I get rount to that, I wanted to build everything else on a solid well understood foundation and so for the backend picked:

  • C# and .Net 4.5.1 – I’m hankering to experiment with Go but if I added that to everything else there’s no way I’d finish in 12 hours so I stuck to C#.·
  • Azure – table storage, web sites and a worker role. I plumped for table storage rather than SQL as I want this to scale easily and be super cheap to run – I’m paying for it myself and am willing to sacrifice features and some development complexity for a lower monthly bill.
  • Asp.Net Web API – I know this really well now so an obvious choice for the web service layer given I was using C#.
  • My open source Azure application framework, it wraps up most common operations you’d undertake against the core of Azure in a testable fashion and makes deployment and configuration easy.
  • My open source ASP.Net Identity 2.0 table storage provider.
  • The Bootstrap CSS template for the UI. Looks ok out the box and I can apply an off the shelf theme easily later (or tinker with it myself).

Most of the above took place in my head with a handful of notes.

Hour 2 – AngularJS Research

I didn’t expect this to hold too many surprises in terms of the overall system architecture as I’m pretty familiar with rich browser application development in jQuery and have some experience in backbone and Knockout but I didn’t know how to structure an application properly in AngularJS.

All I’d done with this previously was really an equivalent of the sample on the home page tucked away inside another website but it looked to be a super useful and comprehensive single page application framework that could provide a really clean MVC structure for a JavaScript client. I basically went through the developer guide at quite a clip and looked at the structure of a couple of non-trivial apps.

I was no expert after an hour, and didn’t expect to be, but I felt I could build the backend and not get surprised by the front end to a degree that would cause me to uproot the system architecture. Importantly I learned how I could integrate the client with the authentication endpoint via a helpful blog post (thank you!) which also introduced me to interceptors – most handy.

Hours 3 to 6 – Build the Backend

The storage model fell pretty trivially out of the requirements and came together quickly. I used the Chrome plugin Postman to test my REST interface without needing to write further code. I used my standard approach to this sort of thing in terms of project structure.

Nothing really new at all so largely just predictable legwork and at the end of the period I had a clean back end following a fairly pure REST model that I was fairly sure would work for the UI and I could deploy into Azure. So I did just that.

Hours 6 to 12

Best summarised as grappling with AngularJS with lots of Googling and referring to the documentation!

Actually to be fair other than a couple of pain points it was rather simple and I’m pretty sold on AngularJS as a framework for single page applications, I will certainly be using it on future projects.

I basically copied the application folder structure I would use if I was building a traditional server page request website in ASP.Net MVC and that I’d seen used in a couple of other apps that worked out really well with controllers, views and services separated by folders. I added a service layer that used the $http angular module to talk to my Web API and kept the http grub out of the controllers.

I managed to avoid the temptation to fall back to old patterns and stuck as far as I could to straight AngularJS, for example it was tempting to start inserting jQuery all over the place to show and hide things whereas I really wanted to do this in a clean and declarative fashion using Angular.

I had to refactor things a couple of times but nothing major – it came together quite easily. The last hour was putting a front page on it and dealing with something I hadn’t considered – as a new user when I went to the bookmark feed there is no real clue as to what to do next so I added a quick “if there are no links welcome page”. By the time I’d begun the UI work my own test account was littered with links!

The things that caused me most pain:

  • CORS support. My client website was running in a different domain (localhost in development) to my Web API and would in production (it’s static HTML so why waste expensive Asp.Net server resource!) and this meant I needed to use the CORS protocol (Cross Origin Resource Sharing) to access the Web API from JavaScript. Except…. it didn’t work. After much teeth gnashing it turned out that there were issues with the Web API 2.0 binaries and accompanying Web API 2.0 CORS package and I would need to upgrade to 2.2. I did this but in Microsoft’s recent “fun” fashion that included breaking changes on a point release. Fortunately simple to fix and then everything worked fine.
  • Infinite scrolling. I wanted to take an infinite scrolling approach to the bookmark list. You’ll have seen this if you’ve use things like Facebook or Twitter in a web browser – there are no “next page” and “previous page” buttons you simply scroll towards the end of the page and the next page is fetched in the background and added to the bottom. There is an AngularJS module that purports to assist with this however it had a number of bugs (must do a pull request) and so I spent 30 minutes learning the code and fixing them. Fortunately it was only 100 lines of code to deal with and still was a net win in terms of time. Maybe I’ve just missed something in terms of library dependencies.

Lessons Learned

  • AngularJS is pretty cool! Easy to use, well considered, and provides excellent structure. My only concern is that while digging around for answers to common problems it seems to be evolving very quickly with not a lot of consideration given to backwards compatibility. Maybe I’m wrong – I’m utterly new to it.
  • By keeping things tightly focussed I had something in the hands of a customer (me!) in 12 hours from start to finish. It doesn’t let me do things I’d eventually want to do (edit links and tags, delete links for example) and has some rough edges but I can already use it and “pilot” it myself in a beta fashion. I shipped as early as I absolutely possibly could.
  • The aggressive timescale meant I couldn’t go off on architectural / development flights of fancy, not that that’s really my thing – see below. I think every line of code I wrote in this system is specific to the business problem in hand. No custom UI components, no custom architecture, no funky “time saving” code / model / blah blah blah generators that are often the symptom of over architected solutions put together by people with too much time on their hands! My first choice was always to go find something off the shelf (hence my infinite scrolling bug fixes – and even factoring that in it was quicker than writing it myself).
  • There are lots of things I’d like a site like this to do (social sharing, editing as above, public / private feeds and links, trending URLs) and while I had those in mind and have rough views of how to build them I did not allow myself to get distracted by them. If I had my 12 hours would have become a week, would have become 2 weeks and so on. Just because they are not in v1 (or v0.1 if you prefer) doesn’t mean they can’t be put into v1.1.
  • You really do need to stand on the shoulders of giants – I can’t emphasise enough how strong my belief is that if the code you are writing is not specific to your particular problem then you’re going wrong: you’re hovering around the ankle while someone else starts at head height!

Next Steps

  • Understand the best way to unit test AngularJS and, errr, write the unit tests.
  • Present a tag list in the UI.
  • Deal with error conditions, particularly http errors, in a consistent way.
  • Beef up validations on both the server and the client.

Contact

  • If you're looking for help with C#, .NET, Azure, Architecture, or would simply value an independent opinion then please get in touch here or over on Twitter.

Recent Posts

Recent Tweets

Invalid or expired token.

Recent Comments

Archives

Categories

Meta

GiottoPress by Enrique Chavez