If you’re developing mobile applications and you’re a .Net developer there’s a fair chance you’re using Web API to present access to server side resources. I’ve already covered how to authenticate using organisational accounts with MVC 5 which is a good choice for many applications, particularly business apps, but if you’re working in the consumer space you may want to allow your users to login using social media identities such as Facebook or Twitter.
There’s a really good tutorial on the ASP.Net web site covering how to do this if you’re working in a browser but it doesn’t, directly at least, cover how to do this from a native mobile application. In this post I’m going to take you through the steps required to do this from an iOS application written using the Xamarin tools (if you’re a C# developer working on mobile they are very much worth checking out). I’m going to focus on Facebook but the same approach works for the other providers supported by Web API 2: Facebook, Twitter, Microsoft Accounts and Google Accounts are all supported straight out of the box.
The below walks through the process of configuring Azure, Facebook, a Web API project and a Xamarin mobile application, you can walk through it for the most part (there is the odd missing step – instance variable declarations for the most part) but really it’s intended as a guide to go along with the source code that is on GitHub here.
We’re going to host our Web API on Azure so begin by going to the Azure management portal and create yourself a free website. Take a note of the URL as you’ll need it later. Also create an empty SQL Database either on a new or existing server and take a note of the credentials, you’ll need this later.
Configuring Facebook
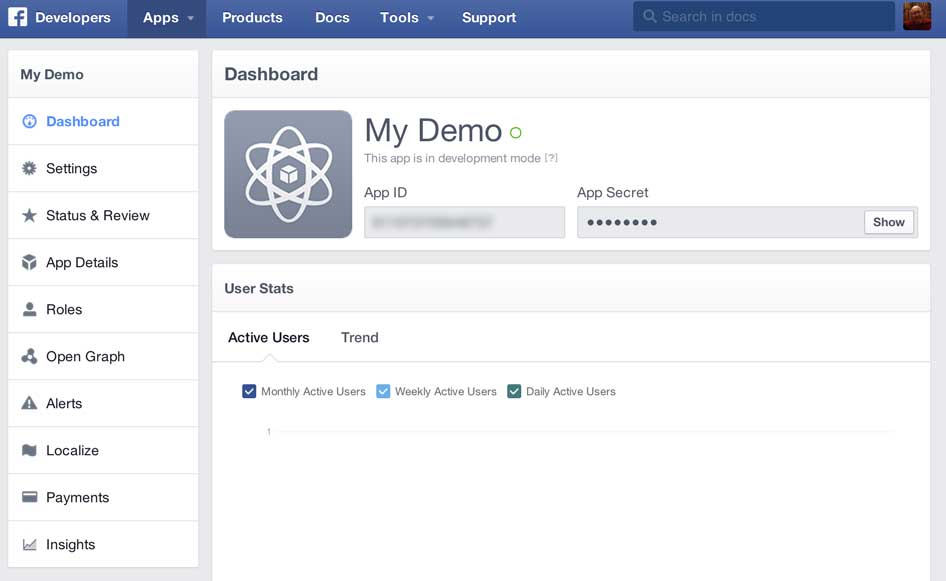
Firstly you need to create a Facebook application in the Facebook developer portal (http://developer.facebook.com). From the developer portal homepage select Apps -> Create a New App and enter the Display Name for your app and the Category applicable to your app and click Create App. At the time of writing there is a bug in the portal and after it finishes whirring away the dialog box stays on the screen, but your app has been created. Refresh the browser and select the Apps menu again and click the name of your app (that you should now see there). You should see a screen like this:
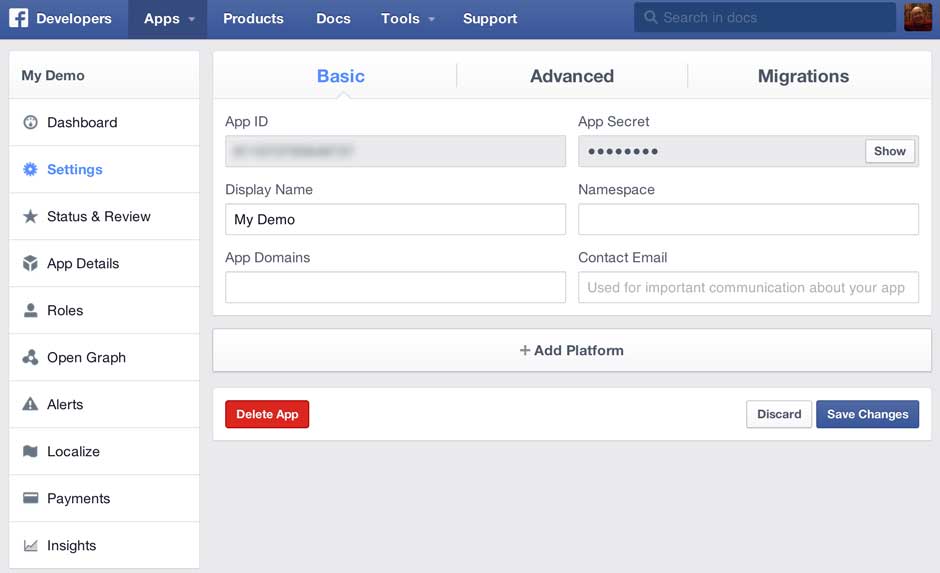
Take a note of the App ID and the App Secret as you’ll need them later (click the show button to see the App Secret) and then click the Settings option on the left to show the settings screen for your app:
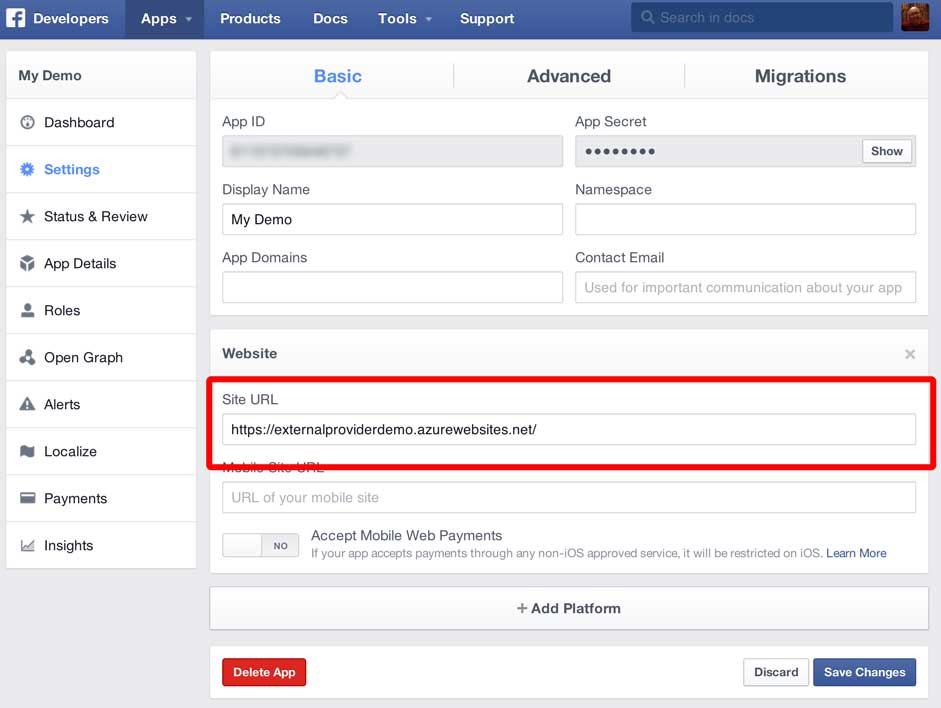
Now click the Add Platform button and choose Website. In the Site URL text box enter the URL you noted earlier from Azure and click Save Changes:
That’s Facebook configured to allow your application to logon so now we’ll go and create our Web API project and wire it up to Facebook.
Web API / Visual Studio
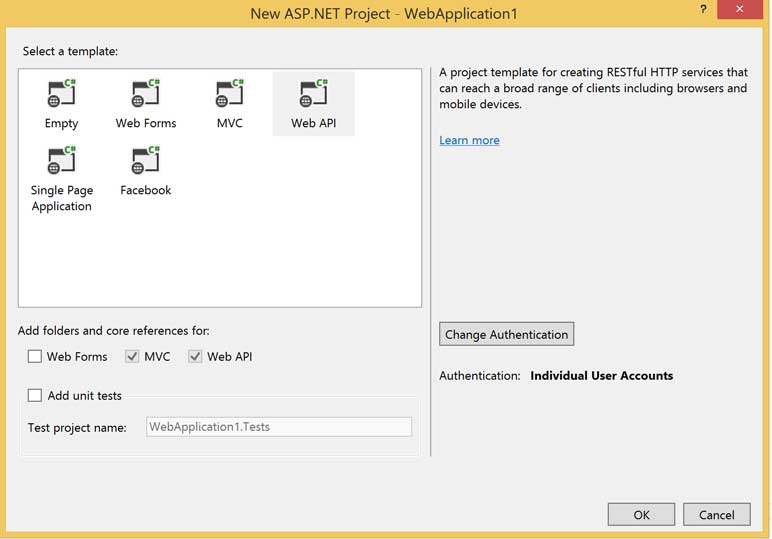
In Visual Studio 2013 create a New Solution and select a project type of ASP.Net Web Application for .Net 4.5.1. On the configuration dialog that appears select Web API and then click the Change Authentication button. Select an authentication type of Individual User Accounts. Your project configuration should now look like this:
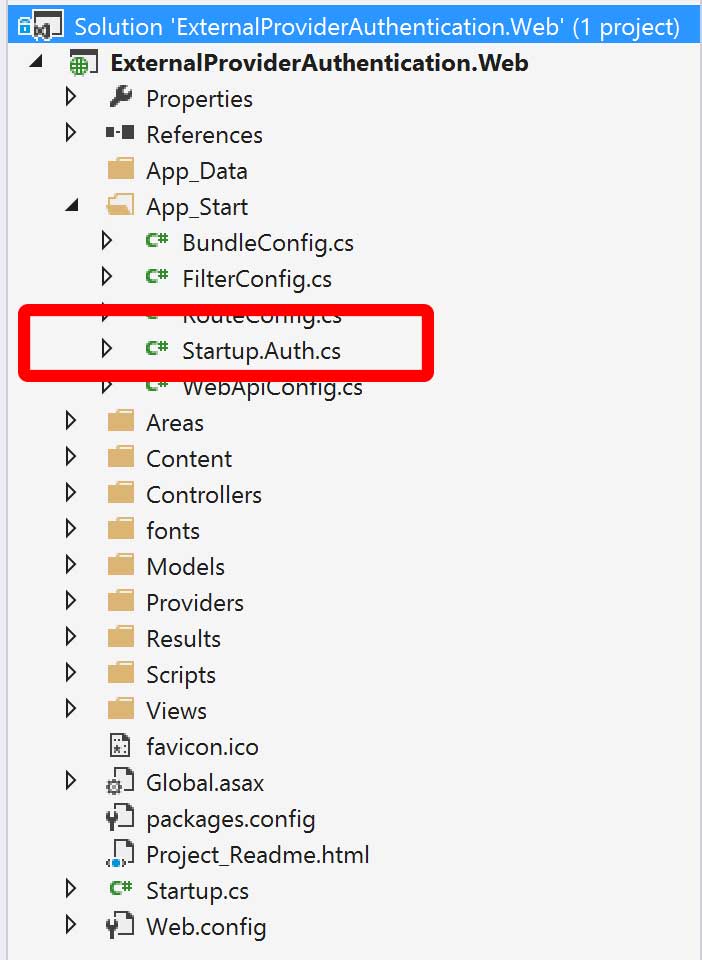
Click OK and your solution will be created with the familiar MVC structure. Open the App_Start folder and open the Startup.Auth.cs file for editing:
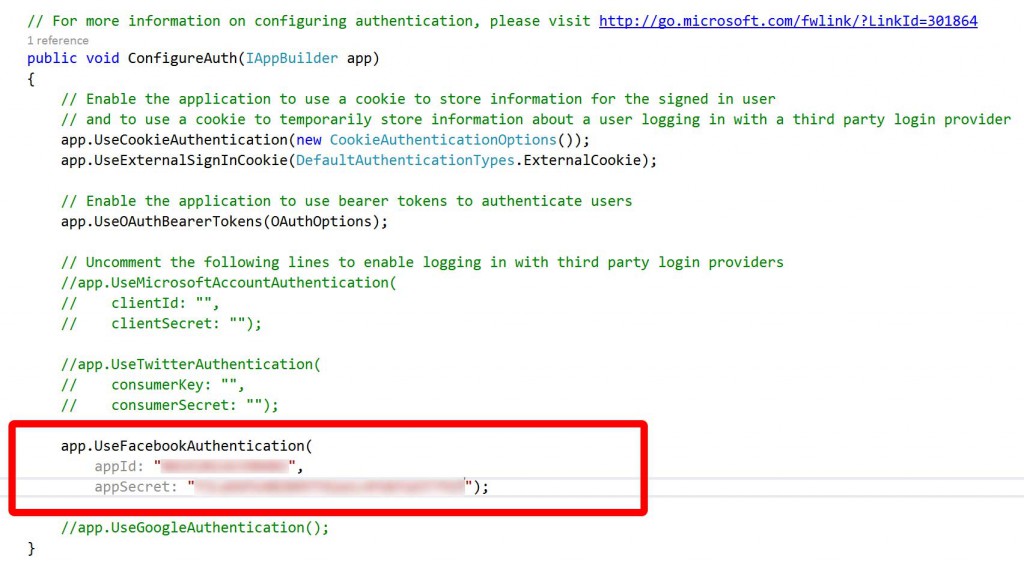
It’s the code in this class and file that configures how Web API will authenticate. By default it’s setup for local accounts – accounts and passwords that are stored in a SQL database that goes along with your app. To add an external identity provider you need to scroll to the bottom of the file and uncomment the appropriate lines for the provider you want.
In this case as we’re authenticating with Facebook we’re going to uncomment those lines and add the App ID and App Secret that we obtained earlier from the Facebook portal:
We’ve got one last step to perform – point the web site at the SQL Database we created earlier by updating the web.config file as shown below:
Believe it or not in terms of code changes that’s it – we’re done. Build and publish the project to the Azure website we created earlier.
Mobile Application
This isn’t really intended as an iOS or Xamarin tutorial so I’m largely going to gloss over the steps that aren’t specifically about the authentication process – if you get stuck post a comment and I’ll reply when I get a chance. Not everybody has the Visual Studio plugin so I’m going to use Xamarin Studio to do this.
To authenticate from the mobile device we need to go through the following high level flow:
- Request a list of external providers and authentication end points from the server.
- Send a get request, from a web browser, to the end point for the provider the user wants to log in with.
- At the end of the process extract the access token from the URL of the page that is showing in the browser.
- Establish if the user is already registered with the server and if not create a user mapped to the external login and then call the authentication end point again.
In practice it’s simpler than it sounds. The key thing is that the authentication process must take place through a web browser, you can’t do this using a native approach. Although you can use something like the Facebook SDK to log in locally against Facebook and then use Facebook that doesn’t result in authentication against your server and web services.
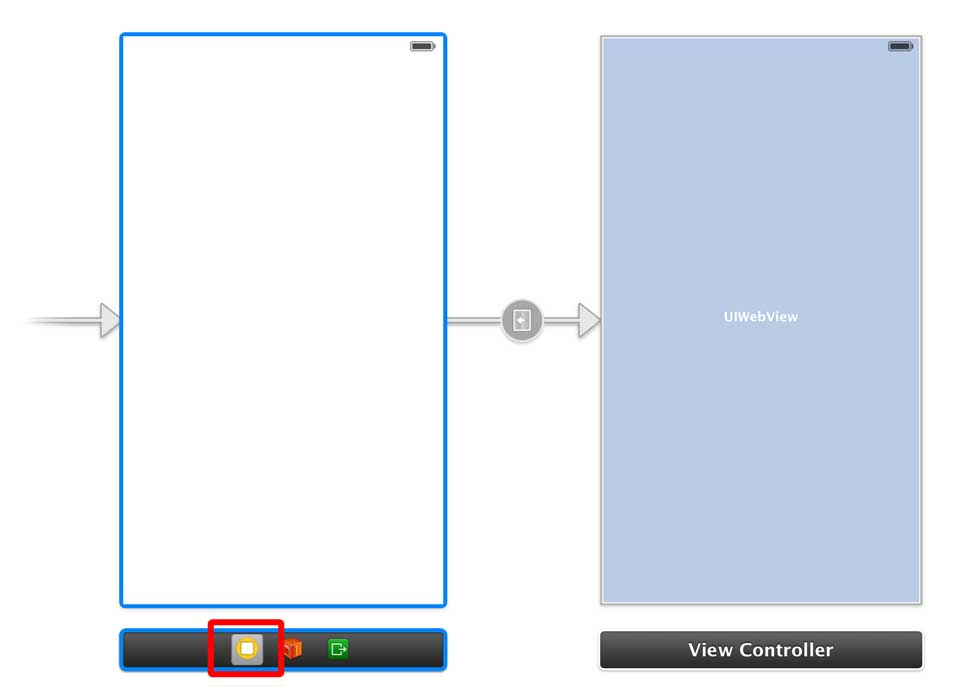
Begin by creating a new iPhone Storyboard project with an application type of Single View Application. Then open the storyboard in the created project and add a second view controller that hosts a UIWebView control. You don’t have anything to create the Segue from as we’re going to drop buttons on programattically and trigger the segue in code so we need to create an segue from the view controller and give it a name – this trips a lot of people up! Basically control click the icon I have highlighted below and drag it to the second view controller. Then click the segue and give it an identifier.
To communicate with the Web API you’re going to need access to some of the models that go with the AccountController – specifcally ExternalLoginViewModel and RegisterExternalBindingModel. In a real application my preference is to extract these models from the Web API project and place them in a portable class library, that way your mobile code and your web code can all use the same models with no code duplication. For the sake of this example copy and paste these classes to your Xamarin project.
We’re going to want to process some JSON so using the Xamarin Component Store add the Json.NET component to your project.
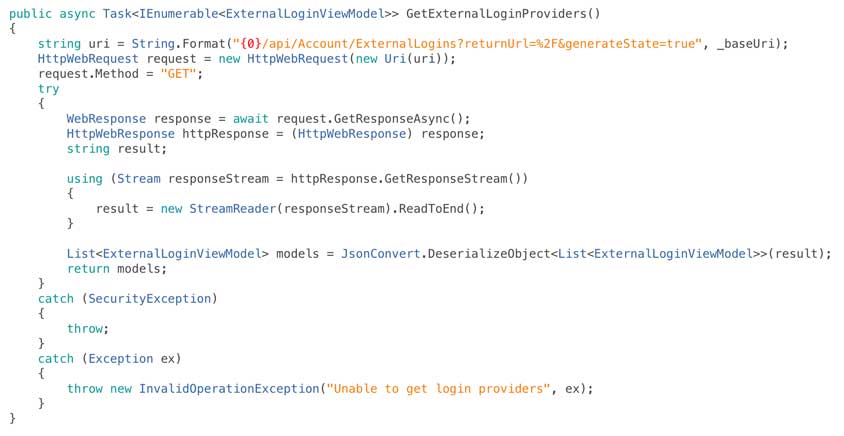
Now we’ve done all that we’re going to add a class called AuthenticationServices within which we’re going to wrap the calls we need to make to Web API directly. To begin with we need a method to let us get the external providers registered with Web API:
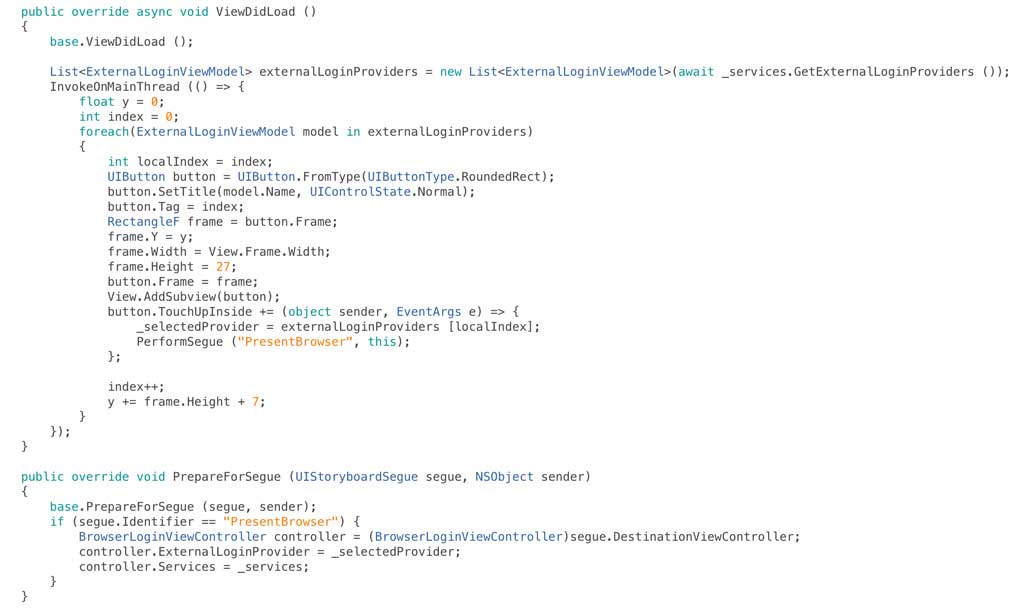
We now need to edit our root view controller so that when the view loads we retrieve the external providers and when one of the buttons is tapped we run the segue to load our second view controller and display the browser, I’ve done this in a slightly hokey way as it just leads to a simpler example than a table view or collection view:
At this point we have a tremendously exciting app that is displaying a Facebook button which when tapped launches the web browser but not much more happens:
To complete the login process we need to do work on the view controller that is hosting the web browser. When the view is loaded we’ll get the URL that has been returned from the server and load it in the browser:
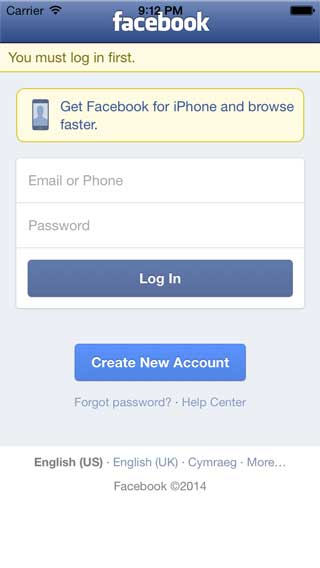
This will present the Facebook login page as shown below:
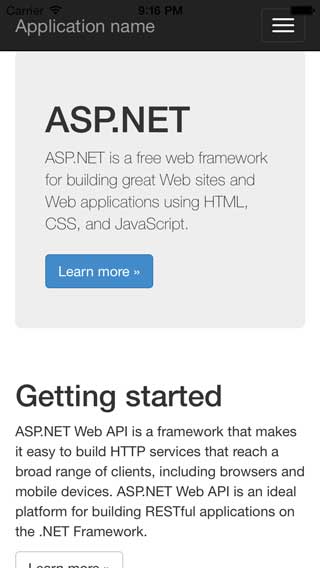
If you enter valid credentials then you’ll find that eventually you end up back at your web sites home page:
If you look at the URL (which will have been output to Xamarin Studio’s Application Output window) you’ll see it includes the access_token as a parameter. This is the bearer token that I’ve discussed in a previous post and which you need to pass as a header to Web API for future authenticated requests.
Having got this far we now need to check and see if the Facebook user has a registered account with our web services and if not create one. There are two ways you can find this out – you can either ask Web API the question on the endpoint /api/Account/UserInfo or take a shortcut and look at the cookies that have been set. In this example we’re going to do the latter.
In external identity provider scenarios ASP.Net makes use of two cookies, one is called .AspNet.ExternalCookie and the other is called .AspNet.Cookies. When a user has logged in with an external identity provider but doesn’t yet have an account with our web service then the .AspNet.Cookies cookie will not be set. So to find out if this is the case we’re going to have a look in the applications cookie store:
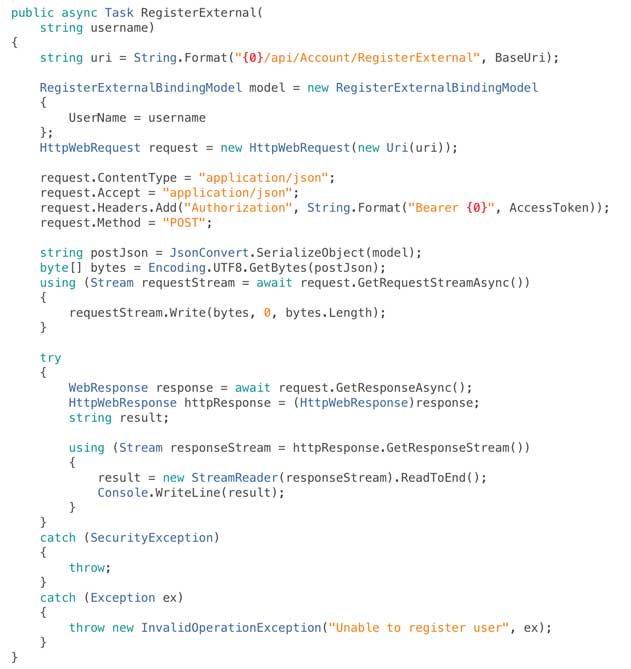
We also need to add some code to actually call Web API’s external account registration method into our AuthenticationServices class, in the example below I’m supplying a hard coded username but in reality you would collect this from the user:
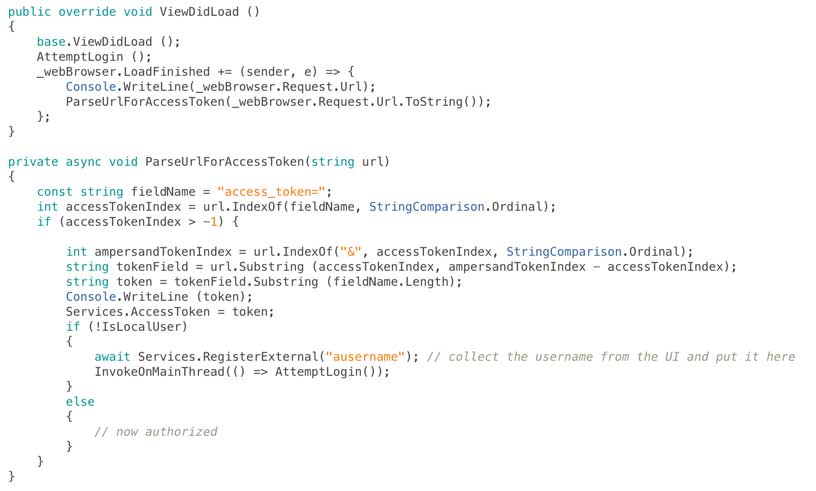
And finally we need to look for the access token in the URLs that appear in the web browser as the authentication process takes place and react to them appropriately (gather the access token, look for an account, register if necessary, then move on):
In production code it’s definitely worth also verifying that the access token is on a URL that maps to your domain.
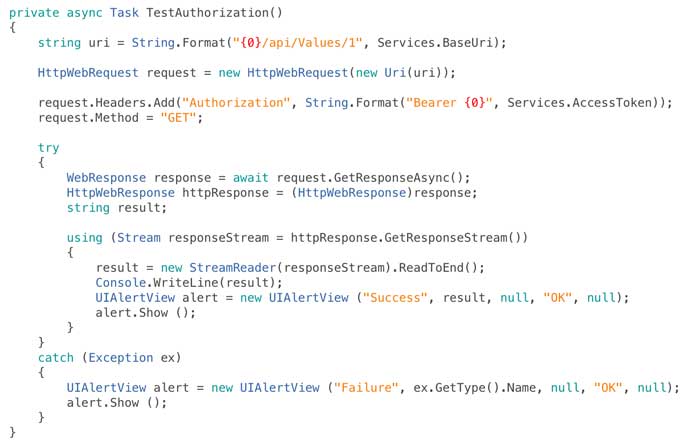
If you run the app at this point the full authentication chain will work but we’re not actually doing anything to prove that. So finally lets add a step to call the default get handler on the sample ValuesController that Visual Studio included in our Web API project and call it on a successful login / registration:
At this point we’re done – we’ve secured our web services with a Facebook login and you can easily extend this to Twitter, Microsoft Accounts or Google by uncommenting the other lines of code in Startup.Auth.cs. Behind the scenes if you look into the SQL database that the ASP.Net authentication system will have created you’ll see a user in the users table and a login for the Facebook provider in the logins table.
If you’d rather use table storage for your user data you can use my alternative ASP.Net user store provider that I outlined here.
The account controller contains other methods to support logout and get information about users but it’s all pretty straightforward once you understand the workflow to login and register.
Hope that’s useful, if you spot any problems let me know in the comments.





Recent Comments